

Many of you know that health and nutrition are two of my favorite hobbies. I'm not a certified nutritionist or anything, but I've been researching food and nutrients since my highschool years, purely as a form of entertainment and fascination.
As I've learned new things, and rethought a lot of what I thought I knew before, I've complied a mental list of myths in the health world. Some of them are mainly amusing to me, while others make me passionately - and loudly - driven to correct whoever believes the myth. Here are the top ten, (in no particular order), for your viewing pleasure.
1. Nuttella is healthy.
I didn't even know this was touted as truth until recently. The first time I heard someone say it, I wanted to laugh hysterically. Seriously?!?! Who believes this? Turn the jar around and read the sugar and fat content, folks.
2. Whole grains are good for you.
While not exactly a myth, this one has to be taken with a grain of salt (pun intended). Whole grains can be good for you, but they can also be harmful, if consumed in the wrong way. For example, there IS such a thing as a "wheat belly"; extra padding around the waist, directly related to the over-consumption of grain. Most Americans eat a diet much too high in carbohydrates, and eating grains (especially refined grains, but whole grains as well) can add to that problem. Whole grains can also be extremely hard to digest - one of my main concerns with them. Many of the nutrients they contain cannot be absorbed by the human body unless the phytic acid in the grain is broken down first. That can be done be presoaking, using sourdough, or using sprouted grain. ....But that topic is too vast to get into here. Suffice it to say that grains - EVEN whole grains - should be used in moderation, and are not the cure-all they are touted as being; especially when our modern strains of grain are so damaged by genetic engineering. ...But I really should stop. Whole grains ARE better than refined, but even whole grains should be prepared properly before consumption.
3. If I eat salad, I'm consuming less calories, and therefore my meal is healthier.
I have two problems with this; #1, who said calories had anything to do with the HEALTH of the substance? and #2; Have you ever looked at the ingredients on your salad dressing?
4. All dairy is bad for you.
I've heard so many of my friends guilt-trip themselves for eating cheese! But God promised the Israelites a land flowing with milk and honey, and God always gives good gifts to His children, so milk can't be inherently bad for you. (Don't you love using the Bible to solve questions in all areas of life?) Now, I do have a huge problem with the hormones added to store-bought milk, and the processing it goes through before it gets to the shelves, but the milk itself isn't the problem. I try to limit my consumption of store-bought dairy, especially items with full fat, since that's where most of the processing affects the milk, but I don't bother with artificially low-fat items (except milk itself), and I eat plenty of sour cream and kefir. :) ....As far as cheese goes, different types of cheese are better for different types of people with various health issues, so do some research to see if it affects your current state of health. But, like I said, my problem with dairy isn't dairy; it's the processing. Pure, creamy fresh milk is a good gift from God! :) ....unless you're counting calories. :)
5. Peanut butter is good for you.
Really? This is a favorite "protein source" for many people. I love my peanut butter as much as anybody; it ranks right up there with chocolate (sorta), but I have reservations about calling it a health food. First of all, one TBS of protein only contains about 3.5 grams of protein. That's something, but not too extravagant or amazing. Meat or an egg would do just as well - probably better. Secondly, most peanut better is extremely high in fat, and contains quite a bit of sugar. For me, consuming all that fat in order to get a little protein is rather counter-productive. The bigger issue comes if you're talking about a brand of peanut butter that is made with hydrogenated fats - and many, if not most, fit that bill. So, all in all, I choose to eat (and I do eat it!) peanut butter that is made with NON-hydrogenated fats, little to no sugar, and I'm honest about the fact that I'm splurging when I eat it. :)
6. Fries are a vegetable. Coffee is a bean. Chocolate is a bean. Onion rings are a vegetable.
These just make me laugh, and I think that's what they were intended to do. :) :) :)
7. Chocolate is terrible for you.
Excuse me; sugar is terrible for you (and THAT is what can cause acne, incidentally). Bad fats are awful for you. Overdose of caffeine is bad for you. Real chocolate, made with healthy fats and little to no sugar? WONDERFUL for you. :) :) :)
8. Eating good stuff balances out the bad.
Sorry; doesn't work like that. Try eating some poison while your stomach is full of carrots and lettuce. It'll still kill ya.
9. If you eat healthy, you will be healthy.
Only God controls your health. Eating well is your responsibility as a steward of the body God has given you, but it doesn't guarantee you a thing. Besides, there are so many other factors involved, like exposure to toxins in the environment, stress (which lowers the immune system), and yes, occasionally even genetics.
10. Healthy food tastes terrible.
Sigh. I'm still trying to convince a brother that this one isn't true. God is the giver of life, and He made food designed to not only nourish the human body, but to bring us pleasure. Healthy food can taste nasty, but it's not supposed to. REAL food is supposed to taste delicious. Honest.
What myths - food related or otherwise - are some of your pet peeves?
Showing posts with label kitchen. Show all posts
Showing posts with label kitchen. Show all posts
Monday, June 10, 2013

Wednesday, March 13, 2013
How to Freeze One-size Portions
I don't know how many of you will find this useful, but since writing my post yesterday, I realized that it wasn't a very informative one. ...So here's a "how to" post, to supplement the brain-dead blurb I wrote yesterday (can't blame a person, after spending 8.5 hours in the kitchen, right?).
What do you do if you want use the convenience of freezer meals, but don't want to defrost a whole 9"x13" pan of lasagna just for one meal for yourself? It's rather hard, doing this "freezer meal" thing for only one person, yet if you are making special-diet meals, you are really only cooking for one or two people.
There are several solutions to this dilemma;
- You could divide each pan into serving-size portions, and then buy a ton of little plastic containers to freeze each portion separately.
- You could really, actually, thaw out that whole 9"x13" pan of chicken casserole, and then eat nothing but chicken casserole for six days. (Chicken oatmeal, anyone?)
- You could freeze the whole lasagna in the big pan, then keep a hack saw, hammer, and chisel on top of the freezer, and use them each time you want to hack off a portion to thaw.
- OR you could do it this way:
Supplies:
You will need
- Freezer paper
- A large cookie sheet
- Large spatula and knife
- A freezer (*grin*)
- Handiwrap
- Freezer bags
- 9x9 Aluminum pan (optional)
- One 9"x13" pan of whatever you want to freeze. This method will work will with just about anything you'd normally bake in a 9x13. Even "looser" casseroles, like rice and chicken. (I'm going on faith, there, actually; my first batch of that casserole is still in the freezer for the first step right now. But I'm sure it's going to work.)
Directions:
It's pretty simple. First, bake the casserole. (This won't work with things that have to be frozen before baking. Sorry.)
Let the casserole cool completely. Almost every casserole will "firm up" a bit as it cools, which means it holds together much better cool than hot.
Once cooled, slice neatly into serving-size portions. (About 12 squares, for a typical casserole in a 9x13.)
Line your large cookie sheet with freezer paper, waxy side up. Do not substitute wax paper for the freezer paper.Unless, of course, you enjoy picking wax paper out of your spaghetti pie, or you like the taste of wax paper. I won't tell you how I know that won't work.
Ever so carefully, lift each square of casserole out of the pan, and set it on the freezer paper on the cookie sheet. (The freezer paper will want to roll up on itself, so I usually start out by putting one square in each corner, to hold it down. Bonus tip; no charge. :) )
If your cookie sheet is nice and large, you should be able to fit a whole casserole on one sheet. You can put the squares as close as you like so long as they are not touching. There's gotta be some space there. If the casserole is a bit soft, you may have to carefully press it into neat squares again after you transport it to the cookie sheet, but just be sure that in the end the squares aren't touching.
Cover the squares with another sheet of freezer paper - waxy side down, this time. Move the cookie sheet to the freezer, and make sure it's level on the shelf before you shut the door. (Why, no, our freezer is never crowded and I would never stack the cookie sheet on top of a uneven mound of bags in there. Why do you ask?)
After two or three hours - or however it takes for the casserole to freeze solid - take the cookie sheet out, and carefully pry the squares off the freezer paper. (Don't leave it in the freezer longer than overnight; it will begin to taste like the freezer.) Wrap each square tightly in handiwrap, and stack neatly in an aluminum pan, then slide the pan into a freezer bag. The pan is actually optional; I just use it because it makes the whole stack more sturdy in the freezer. A 9x9 square pan fits perfectly into a gallon-size freezer bag, if it's not loaded too far above the edge.
Now comes the fun part. Seal the bag almost all the way, leaving a space just big enough to insert a straw. Now (guess what?!) insert a straw in that hole. Take a deep breath. Exhale. Put your mouth on the straw and suck. You'll have the pleasure of seeing the whole bag shrink-wrap around your stack of squares, and look very professional. Slide the straw out and seal the bag in one quick motion.
You're done! (Probably in less time that it took to read that wordy batch of instructions. Don't you love all my parenthesis?) Now, anytime you want a freezer meal, pull out the amount of servings you need and unwrap them before putting them in a covered dish in the fridge to thaw. (The unwrapping part is important.) Once thawed, use your method of choice to re-heat them; microwave, toaster oven, oven, stove top, or whatever you want to do.
Enjoy a freezer meal just your size!
What do you do if you want use the convenience of freezer meals, but don't want to defrost a whole 9"x13" pan of lasagna just for one meal for yourself? It's rather hard, doing this "freezer meal" thing for only one person, yet if you are making special-diet meals, you are really only cooking for one or two people.
There are several solutions to this dilemma;
- You could divide each pan into serving-size portions, and then buy a ton of little plastic containers to freeze each portion separately.
- You could really, actually, thaw out that whole 9"x13" pan of chicken casserole, and then eat nothing but chicken casserole for six days. (Chicken oatmeal, anyone?)
- You could freeze the whole lasagna in the big pan, then keep a hack saw, hammer, and chisel on top of the freezer, and use them each time you want to hack off a portion to thaw.
- OR you could do it this way:
Amber's One-Person Freezer-Meals Freezing Secret
(The secret isn't freezing, of course; just the meals. ...Actually, that was pretty corny. It's past my bedtime, okay?) Supplies:
You will need
- Freezer paper
- A large cookie sheet
- Large spatula and knife
- A freezer (*grin*)
- Handiwrap
- Freezer bags
- 9x9 Aluminum pan (optional)
- One 9"x13" pan of whatever you want to freeze. This method will work will with just about anything you'd normally bake in a 9x13. Even "looser" casseroles, like rice and chicken. (I'm going on faith, there, actually; my first batch of that casserole is still in the freezer for the first step right now. But I'm sure it's going to work.)
Directions:
It's pretty simple. First, bake the casserole. (This won't work with things that have to be frozen before baking. Sorry.)
Let the casserole cool completely. Almost every casserole will "firm up" a bit as it cools, which means it holds together much better cool than hot.
Once cooled, slice neatly into serving-size portions. (About 12 squares, for a typical casserole in a 9x13.)
Line your large cookie sheet with freezer paper, waxy side up. Do not substitute wax paper for the freezer paper.
Ever so carefully, lift each square of casserole out of the pan, and set it on the freezer paper on the cookie sheet. (The freezer paper will want to roll up on itself, so I usually start out by putting one square in each corner, to hold it down. Bonus tip; no charge. :) )
If your cookie sheet is nice and large, you should be able to fit a whole casserole on one sheet. You can put the squares as close as you like so long as they are not touching. There's gotta be some space there. If the casserole is a bit soft, you may have to carefully press it into neat squares again after you transport it to the cookie sheet, but just be sure that in the end the squares aren't touching.
Cover the squares with another sheet of freezer paper - waxy side down, this time. Move the cookie sheet to the freezer, and make sure it's level on the shelf before you shut the door. (Why, no, our freezer is never crowded and I would never stack the cookie sheet on top of a uneven mound of bags in there. Why do you ask?)
After two or three hours - or however it takes for the casserole to freeze solid - take the cookie sheet out, and carefully pry the squares off the freezer paper. (Don't leave it in the freezer longer than overnight; it will begin to taste like the freezer.) Wrap each square tightly in handiwrap, and stack neatly in an aluminum pan, then slide the pan into a freezer bag. The pan is actually optional; I just use it because it makes the whole stack more sturdy in the freezer. A 9x9 square pan fits perfectly into a gallon-size freezer bag, if it's not loaded too far above the edge.
Now comes the fun part. Seal the bag almost all the way, leaving a space just big enough to insert a straw. Now (guess what?!) insert a straw in that hole. Take a deep breath. Exhale. Put your mouth on the straw and suck. You'll have the pleasure of seeing the whole bag shrink-wrap around your stack of squares, and look very professional. Slide the straw out and seal the bag in one quick motion.
You're done! (Probably in less time that it took to read that wordy batch of instructions. Don't you love all my parenthesis?) Now, anytime you want a freezer meal, pull out the amount of servings you need and unwrap them before putting them in a covered dish in the fridge to thaw. (The unwrapping part is important.) Once thawed, use your method of choice to re-heat them; microwave, toaster oven, oven, stove top, or whatever you want to do.
Enjoy a freezer meal just your size!
Tuesday, March 12, 2013
Once-a-Month Cooking for One Person
With a blog called "Fruit of Her Hands," I really ought to blog more about actual "fruit producing" that I do around the house. Sorry about that. I'm just so busy with real life that I rarely take time to mention it on here!
However, I'm happy to pop in today (er, tonight), and tell you that I've been quite productive today! I figured it was about time for a "housekeeping" post. :)
Have you ever done once-a-month baking? I've always wanted to try it. I've done LOTS of cooking-for-a-crowd, and figured once-a-month cooking couldn't be too much harder. The idea of saving so much time and money - at the same time - enthralls me.
Mom didn't think right now was good timing to try month-cooking for the family, but because I am on a special diet, I decided to make up a bunch of stuff that I can eat - once-a-month cooking for myself! Mom gave the go-ahead, and I started my experience.
I spent over a week planning my menu and cooking-plan-of-action. Today, after a long day in the kitchen (9:30am -6:00pm), I can sit here with aching feet and tell you that the hardest part really was the planning. My initial menu was WAY too complicated. And expensive. I wanted to challenge myself to spend less than $80.00 on food for the whole month. That's plenty for one person, right?
Well...that depends. When your diet consists of a lot of fresh foods, cheap can be very illusive. I finally decided not to worry about buying every single item I'll be putting in my mouth this month, but to focus on three things; making up a few breakfasts, ingredients for smoothies, and making most of the main dishes. On my third attempt, the menu looked doable. I spent MUCH less than $80.00. Like...less than half of that. Less than $30.00.
I went shopping yesterday. I hit two stores - Walmart and Kroger - to get the best bang for my buck. I was very pleased with the results. Even Mom complimented me on how much food I made for the amount of money I spent; and, coming from the Queen of Penny-stretching, that's a compliment indeed. :)
Today was baking day. Like I said above, I spent about 8.5 hours straight in the kitchen today; and I do mean straight. I didn't even take a break for lunch. ....Just nibbled a bit as I went. :)
Honesty compels me to admit that even though my legs hurt right now, those hours in the kitchen today were not a burden. I love cooking and baking. I just kept on a'rollin', churning out dishes and getting tired, but enjoying myself. :) So glad God made me to enjoy that kind of work!
Anyway...would you like to see what I got done today? I'm so happy with what's been finished, and I have only a few things to finish up tomorrow. I hope the stuff that I'm freezing does well. Any of you ever frozen cabbage before? I hope it doesn't get too soggy when thawed. ....Oh well. :)
Here's what I did!
- 4 containers of Chili (about 12 servings or more)
- 12 servings of Cabbage Lasagna (gluten free!)
- 12 Black Bean Brownies (gluten free, and yummy!)
- 1 bag of Lentils, cooked (for future projects)
- 1 bag shredded cabbage (for future soups. It was on sale. Couldn't resist.)
- Rice (for a casserole I'll put together tomorrow)
- Potatoes and carrots roasted (for soup, to be assembled tomorrow)
- 1 chicken, cooked and shredded (for the casserole and soup)
- Milk for kefir, divided and frozen so it will stay good all month long
- 12 Orange Poppy-seed muffins (gluten-and-sugar-free and yummy!)
- 4 bananas sliced and frozen, for smoothies
- 13 lentil sausage patties (they're delicious, really!)
- Chicken bones for bone broth ready for simmering tomorrow
- 16 (?) Cornwaffles (Ever had these? Basically cornbread batter made into waffles. DeLICIOUS topped with chili! Gluten free, too.)
I think that's everything. I still have things to do, as you can see, but the great majority of work has been done. I'm heading off to the kitchen now to wrap portions of the lasagna and package them for freezing.
I didn't actually do huge batches of cooking today - it was all what I'm accustomed to, cooking for 7 people - but because it's just for one person, I really ended up making a lot of meals! Someday I'd like to try making stuff for the whole family. I like making huge batches of stuff. :) :)
I'm off to the kitchen again! Hope you have a splendid week.
Amber
P.S. If you want to read how I freeze portion-sized meals for just one person, check out this post.
However, I'm happy to pop in today (er, tonight), and tell you that I've been quite productive today! I figured it was about time for a "housekeeping" post. :)
Have you ever done once-a-month baking? I've always wanted to try it. I've done LOTS of cooking-for-a-crowd, and figured once-a-month cooking couldn't be too much harder. The idea of saving so much time and money - at the same time - enthralls me.
Mom didn't think right now was good timing to try month-cooking for the family, but because I am on a special diet, I decided to make up a bunch of stuff that I can eat - once-a-month cooking for myself! Mom gave the go-ahead, and I started my experience.
I spent over a week planning my menu and cooking-plan-of-action. Today, after a long day in the kitchen (9:30am -6:00pm), I can sit here with aching feet and tell you that the hardest part really was the planning. My initial menu was WAY too complicated. And expensive. I wanted to challenge myself to spend less than $80.00 on food for the whole month. That's plenty for one person, right?
Well...that depends. When your diet consists of a lot of fresh foods, cheap can be very illusive. I finally decided not to worry about buying every single item I'll be putting in my mouth this month, but to focus on three things; making up a few breakfasts, ingredients for smoothies, and making most of the main dishes. On my third attempt, the menu looked doable. I spent MUCH less than $80.00. Like...less than half of that. Less than $30.00.
I went shopping yesterday. I hit two stores - Walmart and Kroger - to get the best bang for my buck. I was very pleased with the results. Even Mom complimented me on how much food I made for the amount of money I spent; and, coming from the Queen of Penny-stretching, that's a compliment indeed. :)
Today was baking day. Like I said above, I spent about 8.5 hours straight in the kitchen today; and I do mean straight. I didn't even take a break for lunch. ....Just nibbled a bit as I went. :)
Honesty compels me to admit that even though my legs hurt right now, those hours in the kitchen today were not a burden. I love cooking and baking. I just kept on a'rollin', churning out dishes and getting tired, but enjoying myself. :) So glad God made me to enjoy that kind of work!
Anyway...would you like to see what I got done today? I'm so happy with what's been finished, and I have only a few things to finish up tomorrow. I hope the stuff that I'm freezing does well. Any of you ever frozen cabbage before? I hope it doesn't get too soggy when thawed. ....Oh well. :)
Here's what I did!
- 4 containers of Chili (about 12 servings or more)
- 12 servings of Cabbage Lasagna (gluten free!)
- 12 Black Bean Brownies (gluten free, and yummy!)
- 1 bag of Lentils, cooked (for future projects)
- 1 bag shredded cabbage (for future soups. It was on sale. Couldn't resist.)
- Rice (for a casserole I'll put together tomorrow)
- Potatoes and carrots roasted (for soup, to be assembled tomorrow)
- 1 chicken, cooked and shredded (for the casserole and soup)
- Milk for kefir, divided and frozen so it will stay good all month long
- 12 Orange Poppy-seed muffins (gluten-and-sugar-free and yummy!)
- 4 bananas sliced and frozen, for smoothies
- 13 lentil sausage patties (they're delicious, really!)
- Chicken bones for bone broth ready for simmering tomorrow
- 16 (?) Cornwaffles (Ever had these? Basically cornbread batter made into waffles. DeLICIOUS topped with chili! Gluten free, too.)
I think that's everything. I still have things to do, as you can see, but the great majority of work has been done. I'm heading off to the kitchen now to wrap portions of the lasagna and package them for freezing.
I didn't actually do huge batches of cooking today - it was all what I'm accustomed to, cooking for 7 people - but because it's just for one person, I really ended up making a lot of meals! Someday I'd like to try making stuff for the whole family. I like making huge batches of stuff. :) :)
I'm off to the kitchen again! Hope you have a splendid week.
Amber
P.S. If you want to read how I freeze portion-sized meals for just one person, check out this post.
Monday, November 12, 2012
Sprout and Cook
I hope all you lovely readers are in the mood to cook, because I have a feeling that my next few posts are going to center around the kitchen.
As I've shared previously, I've been experimenting with new recipes the past two months. Mostly, this is due to my temporary restrictive diet, but the results have been (mostly!) so yummy that I think these recipes will find a permanent place in my "favorites" list. They are all super healthy, too, so I'm excited to share them with you!
One of the main reasons most people in America don't have a healthy diet is because of the extra effort and time involved in eating right. (Of course, "right" depends on what your own body needs, and what your state of health is.) Preparing nutritious food does take a bit of extra effort, but I've found a few ways to speed things up.
The trick is two-fold; number one, think ahead. Not "think ahead" as in "four hours before supper," but as in two days before supper. Sound hard to do? Like everything else in life, it's habit. The nice thing is that if you do form this habit, you can cook supper on the spur of the moment; you just walk into the kitchen, warm up your food, and eat it! Sounds just as easy as prepackaged convenience food, doesn't it?
The second trick is going to be the key in a lot of the recipes I plan to share. It's this: sprout and cook.
Whether you're going low-carb, gluten-free, or just want to add some extra nutrients to your baked goods, "Sprout and Cook" is the way to go. It's also super, super, super cheap. I'm all about cheap. Forget those complicated health food recipes that require trips to special stores and spices I've never heard of. Or flours that cost $5 a cup. (Well, almost.) "Sprout and Cook" won't break the bank, and you can even shop at WalMart for your supplies.
So what is Sprout and Cook?
It's the basic idea of using beans as a foundational ingredient in recipes that usually require flour. (Think muffins, pizza dough, etc.) It's also the idea of coming up with brand new casseroles, soups, and fried foods that feature beans as a major component. Yummy beans, not tolerated beans.
Beans have carbohydrates, but they are on the low end of the carb scale. Thankfully, I've been able to tolerate them throughout this diet (some can't). They can be a bit hard on the body's digestive system, though. The concept of sprouting them before use gives you a huge wallop of extra nutrients (sprouts are the most compact source of nutrients!), and essentially turns a seed (hard to digest) into a plant (easy to digest!) .
Now, if you're like me, you're not too super excited about sprouts. Maybe once in a while....in a sandwich...but not as a basis for all my cooking, thank you very much! In Sprout and Cook, the sprouting process is halted at the first stage, just when the beans are starting to grow minuscule tails. After they're cooked, you can hardly tell the difference between the sprouted beans and canned beans from the store.
Healthy? Check. (They're SPROUTS!)
Cheap? Check. (Dried beans from the grocery store!)
Easy?
Check.
Really. Yes, if you sprouted and cooked beans for every recipe, it would be a PAIN. But don't do it that way. Too hard. You're going to love this method so much that you'll be constantly sprouting and cooking. All my recipes call for pre-cooked sprouted beans. The key is to sprout and cook a big batch ahead of time, then keep them in a big bowl in the fridge. (Or freeze them, if you make enough to last longer than a week.) Whenever you're ready to bake, there they are; your lovely friends, the sprouted beans. Already cooked. Just scoop and use. Easy-peesy.
I've been living this way for over a month now. Trust me; you need a bowl of beans in your fridge.
But how do you Sprout and Cook?
Stay tuned for my next post!
As I've shared previously, I've been experimenting with new recipes the past two months. Mostly, this is due to my temporary restrictive diet, but the results have been (mostly!) so yummy that I think these recipes will find a permanent place in my "favorites" list. They are all super healthy, too, so I'm excited to share them with you!
One of the main reasons most people in America don't have a healthy diet is because of the extra effort and time involved in eating right. (Of course, "right" depends on what your own body needs, and what your state of health is.) Preparing nutritious food does take a bit of extra effort, but I've found a few ways to speed things up.
The trick is two-fold; number one, think ahead. Not "think ahead" as in "four hours before supper," but as in two days before supper. Sound hard to do? Like everything else in life, it's habit. The nice thing is that if you do form this habit, you can cook supper on the spur of the moment; you just walk into the kitchen, warm up your food, and eat it! Sounds just as easy as prepackaged convenience food, doesn't it?
The second trick is going to be the key in a lot of the recipes I plan to share. It's this: sprout and cook.
Whether you're going low-carb, gluten-free, or just want to add some extra nutrients to your baked goods, "Sprout and Cook" is the way to go. It's also super, super, super cheap. I'm all about cheap. Forget those complicated health food recipes that require trips to special stores and spices I've never heard of. Or flours that cost $5 a cup. (Well, almost.) "Sprout and Cook" won't break the bank, and you can even shop at WalMart for your supplies.
So what is Sprout and Cook?
It's the basic idea of using beans as a foundational ingredient in recipes that usually require flour. (Think muffins, pizza dough, etc.) It's also the idea of coming up with brand new casseroles, soups, and fried foods that feature beans as a major component. Yummy beans, not tolerated beans.
Beans have carbohydrates, but they are on the low end of the carb scale. Thankfully, I've been able to tolerate them throughout this diet (some can't). They can be a bit hard on the body's digestive system, though. The concept of sprouting them before use gives you a huge wallop of extra nutrients (sprouts are the most compact source of nutrients!), and essentially turns a seed (hard to digest) into a plant (easy to digest!) .
Now, if you're like me, you're not too super excited about sprouts. Maybe once in a while....in a sandwich...but not as a basis for all my cooking, thank you very much! In Sprout and Cook, the sprouting process is halted at the first stage, just when the beans are starting to grow minuscule tails. After they're cooked, you can hardly tell the difference between the sprouted beans and canned beans from the store.
Healthy? Check. (They're SPROUTS!)
Cheap? Check. (Dried beans from the grocery store!)
Easy?
Check.
Really. Yes, if you sprouted and cooked beans for every recipe, it would be a PAIN. But don't do it that way. Too hard. You're going to love this method so much that you'll be constantly sprouting and cooking. All my recipes call for pre-cooked sprouted beans. The key is to sprout and cook a big batch ahead of time, then keep them in a big bowl in the fridge. (Or freeze them, if you make enough to last longer than a week.) Whenever you're ready to bake, there they are; your lovely friends, the sprouted beans. Already cooked. Just scoop and use. Easy-peesy.
I've been living this way for over a month now. Trust me; you need a bowl of beans in your fridge.
But how do you Sprout and Cook?
Stay tuned for my next post!
Friday, November 9, 2012
New Recipes and Ideas
I'm still on this restricted diet; it's been two months now! And I must say, it's gotten harder ...and easier.
Easier because it's more of a habit now. Harder because my mind keeps telling me "you've waited long enough! It's time to got back to regular food now!" while my body says, "no you haven't healed all the way yet."
I'm so ready to just be DONE. Really. truly. Can I gripe for a minute? Thank you. Some days I'm so SICK of self control. "Unhealthy" food isn't the biggest temptation. It's the other stuff. Like the bowl of rosy, crisp pink lady apples on the counter. And the crunchy, luscious granola everybody else has for breakfast. And the steamed peas, salted and buttered to perfection. And homemade bread, with cheese. And cheese. And...you know...granola. And chocolate. And granola. ...And cooked carrots, the sweet things. And molasses on my oatmeal! And cream cheese. And butter. Oh, butter is good.
So I'm ready to be done. I wish my body would hurry up and heal. But even after all this is over, I'll definitely make some changes to my "regular diet." My system has become extremely sensitive to sweetness and carbs. Tonight, my sister made a DELICIOUS looking (and smelling!) three layered pumpkin-caramel-marshmellow-meringue pie. (Calories? 500+ per serving! But that's besides the point.) She's practicing for Thanksgiving - this is not a normal dessert in our house. :) :)
After everyone else was served, I licked the pie server (the utensil, not my sister!), and ran a spoon around the edge of the dish. (Yes, I've started allowing myself to cheat once in awhile, just to keep sane. But that's my "cheat;" licking the spoon, not eating a whole slice!)
As soon as I finishing licking, I felt sick to my stomach. I didn't actually get sick, but I felt like it. Wow. So. Sweet. Overpowering.
So I guess that's a good side effect of this diet. No doubt I will be less able to handle sugar. That's a good thing.
I've also lost weight - in the double digits. That's kinda cool, although I'd better not lose too much more. I think I've leveled off. Haven't lost any more in a couple of weeks.
But I think my favorite part (other than the healing that's going on, of course!) is the new recipes I'm coming up with or finding. Seriously, I love, love, love kitchen challenges, and I love creating healthy dishes!
So far in this adventure, I've done the following... Oh - for those of you who missed my earlier post, these recipes have to be sugar-free, grain-free (aside from oats), dairy-free (aside from kefir), no oil except olive and coconut, no starchy veggies like corn and potatoes, no sweet potatoes, no sweet squashes like butternut, no fruit except berries and citrus, no distilled vinegars, no citrus acid, limited beef, no peanuts, no cashews, no cheese except tiny amounts of mozzarella, no peas, no carrots, no beets, and no coffee or cocoa. I did used to cheat early on in the game, with that last item. :)
So, with those limits to drive my creativity, I have:
- Made my own apple cider vinegar; raw, unpasteurized, with the "mother." SO good for you - and SO easy and cheap to make! Having vinegar I can eat also opens up a bunch of new recipe opportunities.
- Learned how to use dried beans to make gluten-free baked goods, like savory muffins and pizza crust. LOVE how cheap that is compared to "gluten-free" mixes in the store!!!!!
- Accidentally made an alcoholic beverage on our kitchen counter (but that's a looong story!)
- Made homemade mayo that was actually yummy! (sugar-free, of course)
- Tried 1,001 ways to fix lentils. (Not really 1,001.) :) :)
- Made sausage out of lentils. (honest)
- Invented/Discovered fried oatmeal. (Seriously good!)
- Become a total convert to the benefits of oregano oil
- Soaked, sprouted, and toasted raw almonds from our almond tree
- Made sugar-free tomato sauce
- Cheated and watered down pumpkin puree into a delicious hot drink not unlike hot apple cider, with cinnamon and allspice.
- Sprouted, cooked, and eaten approx. 30 lbs. dried beans and lentils. :) Not kidding.
- Made hummus from chickpea sprouts and kefir. So yummy!
- Made subs using cucumbers as the loaf of bread.
- Made lasagna using zucchini sliced thinly instead of noodles. It was really good!
- Eaten about 24+ zucchini.
Upcoming ideas:
- Making Pumpkin-Seed butter (I miss my peanut butter!)
- Get my homemade sauerkraut to finish ripening so I can eat it!
- Try making other condiments, like ketchup (though what I'd eat it on, I don't know!)
I've also made pumpkin donuts, pasta dishes, apple danishes, helped with pumpkin pies, and various other goodies....but those weren't for me. :) I know I really love my family when I can bake for them and not eat it myself! Oh well. Good exercise in self-control.
So, tell me, would you be interested in some recipes? Tips for how to cut up a pumpkin and make pumpkin puree? How to use dried beans to make cheap gluten-free food? How to make apple cider vinegar? Are you interested in that sort of thing, or would these "healthy recipes" be boring?
And do you have any suggestions for how to keep one's self from going into hysterics at the smell of granola? My sister took one look at my red, teary face, my fluttering hands, and promptly pronounced me crazy. :)
Easier because it's more of a habit now. Harder because my mind keeps telling me "you've waited long enough! It's time to got back to regular food now!" while my body says, "no you haven't healed all the way yet."
I'm so ready to just be DONE. Really. truly. Can I gripe for a minute? Thank you. Some days I'm so SICK of self control. "Unhealthy" food isn't the biggest temptation. It's the other stuff. Like the bowl of rosy, crisp pink lady apples on the counter. And the crunchy, luscious granola everybody else has for breakfast. And the steamed peas, salted and buttered to perfection. And homemade bread, with cheese. And cheese. And...you know...granola. And chocolate. And granola. ...And cooked carrots, the sweet things. And molasses on my oatmeal! And cream cheese. And butter. Oh, butter is good.
So I'm ready to be done. I wish my body would hurry up and heal. But even after all this is over, I'll definitely make some changes to my "regular diet." My system has become extremely sensitive to sweetness and carbs. Tonight, my sister made a DELICIOUS looking (and smelling!) three layered pumpkin-caramel-marshmellow-meringue pie. (Calories? 500+ per serving! But that's besides the point.) She's practicing for Thanksgiving - this is not a normal dessert in our house. :) :)
After everyone else was served, I licked the pie server (the utensil, not my sister!), and ran a spoon around the edge of the dish. (Yes, I've started allowing myself to cheat once in awhile, just to keep sane. But that's my "cheat;" licking the spoon, not eating a whole slice!)
As soon as I finishing licking, I felt sick to my stomach. I didn't actually get sick, but I felt like it. Wow. So. Sweet. Overpowering.
So I guess that's a good side effect of this diet. No doubt I will be less able to handle sugar. That's a good thing.
I've also lost weight - in the double digits. That's kinda cool, although I'd better not lose too much more. I think I've leveled off. Haven't lost any more in a couple of weeks.
But I think my favorite part (other than the healing that's going on, of course!) is the new recipes I'm coming up with or finding. Seriously, I love, love, love kitchen challenges, and I love creating healthy dishes!
So far in this adventure, I've done the following... Oh - for those of you who missed my earlier post, these recipes have to be sugar-free, grain-free (aside from oats), dairy-free (aside from kefir), no oil except olive and coconut, no starchy veggies like corn and potatoes, no sweet potatoes, no sweet squashes like butternut, no fruit except berries and citrus, no distilled vinegars, no citrus acid, limited beef, no peanuts, no cashews, no cheese except tiny amounts of mozzarella, no peas, no carrots, no beets, and no coffee or cocoa. I did used to cheat early on in the game, with that last item. :)
So, with those limits to drive my creativity, I have:
- Made my own apple cider vinegar; raw, unpasteurized, with the "mother." SO good for you - and SO easy and cheap to make! Having vinegar I can eat also opens up a bunch of new recipe opportunities.
- Learned how to use dried beans to make gluten-free baked goods, like savory muffins and pizza crust. LOVE how cheap that is compared to "gluten-free" mixes in the store!!!!!
- Accidentally made an alcoholic beverage on our kitchen counter (but that's a looong story!)
- Made homemade mayo that was actually yummy! (sugar-free, of course)
- Tried 1,001 ways to fix lentils. (Not really 1,001.) :) :)
- Made sausage out of lentils. (honest)
- Invented/Discovered fried oatmeal. (Seriously good!)
- Become a total convert to the benefits of oregano oil
- Soaked, sprouted, and toasted raw almonds from our almond tree
- Made sugar-free tomato sauce
- Cheated and watered down pumpkin puree into a delicious hot drink not unlike hot apple cider, with cinnamon and allspice.
- Sprouted, cooked, and eaten approx. 30 lbs. dried beans and lentils. :) Not kidding.
- Made hummus from chickpea sprouts and kefir. So yummy!
- Made subs using cucumbers as the loaf of bread.
- Made lasagna using zucchini sliced thinly instead of noodles. It was really good!
- Eaten about 24+ zucchini.
Upcoming ideas:
- Making Pumpkin-Seed butter (I miss my peanut butter!)
- Get my homemade sauerkraut to finish ripening so I can eat it!
- Try making other condiments, like ketchup (though what I'd eat it on, I don't know!)
I've also made pumpkin donuts, pasta dishes, apple danishes, helped with pumpkin pies, and various other goodies....but those weren't for me. :) I know I really love my family when I can bake for them and not eat it myself! Oh well. Good exercise in self-control.
So, tell me, would you be interested in some recipes? Tips for how to cut up a pumpkin and make pumpkin puree? How to use dried beans to make cheap gluten-free food? How to make apple cider vinegar? Are you interested in that sort of thing, or would these "healthy recipes" be boring?
And do you have any suggestions for how to keep one's self from going into hysterics at the smell of granola? My sister took one look at my red, teary face, my fluttering hands, and promptly pronounced me crazy. :)
Friday, March 2, 2012
Never Say Never
I was walking through the Dollar Store when I saw it. (I know, I shop in the most glamorous places.)
It was sold in small packages, inside a flimsy cardboard box.
Chocolate Cream of Wheat.
Now, I love, love, love, chocolate, but I am no fan of cream of wheat. And the idea of adding chocolate...well, chocolate may be able to cover a multitude of faults, but not a multitude of wheat.
Disgusted with a capital "D". Never was going to try that one.
Well....remember I told you I'm going without refined sugars for two weeks? I was getting desperate for breakfasts without sugar.
A few weeks ago I soaked and coarsely ground some wheat berries. I hadn't used them for bread because our blender didn't grind them fine enough. They were sitting in a baggie in the corner of the refrigerator. I was hungry...I looked at the baggie, and thought...why not? I'll put a lot of maple syrup on it.
...Then I thought about chocolate.
I missed chocolate. Two weeks without chocolate is hard.
...But baking cocoa doesn't have sugar in it. Just cocoa.
Okay - long story short, I mixed a big scoop of baking cocoa with my home-ground cream of wheat, a big scoop of peanut butter, a splash of milk, and a generous drizzle of maple syrup.
Oh. Wow.
So. Good.
Never say never.
It was sold in small packages, inside a flimsy cardboard box.
Chocolate Cream of Wheat.
Now, I love, love, love, chocolate, but I am no fan of cream of wheat. And the idea of adding chocolate...well, chocolate may be able to cover a multitude of faults, but not a multitude of wheat.
Disgusted with a capital "D". Never was going to try that one.
Well....remember I told you I'm going without refined sugars for two weeks? I was getting desperate for breakfasts without sugar.
A few weeks ago I soaked and coarsely ground some wheat berries. I hadn't used them for bread because our blender didn't grind them fine enough. They were sitting in a baggie in the corner of the refrigerator. I was hungry...I looked at the baggie, and thought...why not? I'll put a lot of maple syrup on it.
...Then I thought about chocolate.
I missed chocolate. Two weeks without chocolate is hard.
...But baking cocoa doesn't have sugar in it. Just cocoa.
Okay - long story short, I mixed a big scoop of baking cocoa with my home-ground cream of wheat, a big scoop of peanut butter, a splash of milk, and a generous drizzle of maple syrup.
Oh. Wow.
So. Good.
Never say never.
Monday, February 27, 2012
New Recipe and a New Blog
Well, I'm doing it again.
Going without sugar for 2 weeks, that is. This time my two younger sisters are doing this with me, so it's been much more fun.
Last week I invented a new recipe for a breakfast without sugar, and I thought you might enjoy trying it, too:
Pumpkin Raisin Oatmeal
(Hey, you like Pumpkin Raisin cookies, right? So try it before you say "huh?")
(serves about 4)
- 2 cups quick oats
- 4 cups water (you can do less or more, depending on how thick you like your oatmeal.)
- 1 TBS kefir (or other acid substance, like lemon juice or vinegar, but if you use those decrease the amount to 1 tsp.)
Combine the above in a sauce pan with lid. Stir, cover, and let soak at room temperature overnight.
In the morning, uncover, place on burner over medium heat, and as it starts to warm, add the following:
- 1-2 capfuls of imitation vanilla extract
- 1 egg, beaten
- 1/2 cup pumpkin
- 1/3 cup molasses (you can do a little less, but I really love molasses)
- Spices: cinnamon, nutmeg, ginger
Now, you should add the spices to taste, but remember that because oatmeal is mostly liquid, you'll need to add a LOT of spices to carry through the taste. Be very generous. I do about 1/2 tsp. each of ginger and nutmeg, and probably at least 1 TSB cinnamon....but I never measure, so those estimates may be wrong.
Anyway, add those ingredients, and cover the pot again until it begins to "pop" bubbles. You want it to boil, but keep an eye on it, because as soon as it starts boiling, uncover the pot and begin to stir constantly. You can turn the heat down. Stir for 2 minutes. The oatmeal should turn from looking like soup to...well...oatmeal.
Once you remove it from the heat, stir in a LOT of raisins. This is where you are really sweetening your oatmeal, and they are yummy, so add as much as you like!
Serve hot. Add milk if desired.
Let me know what you think! Don't expect the sugary sweetness of your typical store-bought flavored instant oatmeal packs. This is heartier, and packs more of other flavors, but I like it. If you really can't stand the absence of sugar, you could add a tsp. to the top of each bowl, and pour milk over it, and I'm sure it would be really yummy.
My sisters? One says she likes it as long as the raisins are there to sweeten it. The other doesn't like raisins, but she does love to add peanut butter to her oatmeal. I got her started on that, but I don't like peanut and pumpkin together. Oh well. Each to her own!
Oh yes - my post title said new recipe AND a new blog, didn't it?
Don't worry - I'm not quitting The Fruit of Her Hands. But I have started a new blog! It's all about....well, I'll let the title speak for itself:
Please check it out and let me know what you think!
Going without sugar for 2 weeks, that is. This time my two younger sisters are doing this with me, so it's been much more fun.
Last week I invented a new recipe for a breakfast without sugar, and I thought you might enjoy trying it, too:
Pumpkin Raisin Oatmeal
(Hey, you like Pumpkin Raisin cookies, right? So try it before you say "huh?")
(serves about 4)
- 2 cups quick oats
- 4 cups water (you can do less or more, depending on how thick you like your oatmeal.)
- 1 TBS kefir (or other acid substance, like lemon juice or vinegar, but if you use those decrease the amount to 1 tsp.)
Combine the above in a sauce pan with lid. Stir, cover, and let soak at room temperature overnight.
In the morning, uncover, place on burner over medium heat, and as it starts to warm, add the following:
- 1-2 capfuls of imitation vanilla extract
- 1 egg, beaten
- 1/2 cup pumpkin
- 1/3 cup molasses (you can do a little less, but I really love molasses)
- Spices: cinnamon, nutmeg, ginger
Now, you should add the spices to taste, but remember that because oatmeal is mostly liquid, you'll need to add a LOT of spices to carry through the taste. Be very generous. I do about 1/2 tsp. each of ginger and nutmeg, and probably at least 1 TSB cinnamon....but I never measure, so those estimates may be wrong.
Anyway, add those ingredients, and cover the pot again until it begins to "pop" bubbles. You want it to boil, but keep an eye on it, because as soon as it starts boiling, uncover the pot and begin to stir constantly. You can turn the heat down. Stir for 2 minutes. The oatmeal should turn from looking like soup to...well...oatmeal.
Once you remove it from the heat, stir in a LOT of raisins. This is where you are really sweetening your oatmeal, and they are yummy, so add as much as you like!
Serve hot. Add milk if desired.
Let me know what you think! Don't expect the sugary sweetness of your typical store-bought flavored instant oatmeal packs. This is heartier, and packs more of other flavors, but I like it. If you really can't stand the absence of sugar, you could add a tsp. to the top of each bowl, and pour milk over it, and I'm sure it would be really yummy.
My sisters? One says she likes it as long as the raisins are there to sweeten it. The other doesn't like raisins, but she does love to add peanut butter to her oatmeal. I got her started on that, but I don't like peanut and pumpkin together. Oh well. Each to her own!
Oh yes - my post title said new recipe AND a new blog, didn't it?
Don't worry - I'm not quitting The Fruit of Her Hands. But I have started a new blog! It's all about....well, I'll let the title speak for itself:

Please check it out and let me know what you think!
Monday, October 31, 2011
Sugar Report
Okay - here is a summary of my two weeks without sugar, and then I promise I'll get off the sugar soapbox. For awhile.
Disclaimer:
I didn't go 2 weeks without eating refined sugar.
You know, of course, that I was allowing myself 1 meal each week to eat whatever I liked. I did that on Friday night for both weeks. I had pizza and ice cream, and one week I had a sip of Joe Beans' Iced Mocha as well. Mmmm!
Those were my permissible flumps. (Don't you like that word? I just made it up!)
I had a few other Cheat Moments.
#1 - The homemade chocolate cheesecake at a friend's party last Saturday. I held out through the cookies. And the chocolate raspberry truffles. And the pizza sauce for dipping the Stromboli. But when they sliced the cheesecake....I said "who cares?" and ate a small (very rich!) piece. Oh, It. Was. That. Good.
#2 - I ate a few dried dates that had sugar on them. (Honestly - who in the world thinks they need to sweeten dried dates, of all things? As if they weren't sweet enough?)
#3 - I almost gave in yesterday when Mom served fudge pie for Sunday dinner dessert. The only thing that kept me strong was knowing I'd have to blog about my naughtiness. (I knew there was something to the accountability theory!)
So, what did I observe, and what did I learn?
Well, I'm not sure which was hardest to abstain from; the known sweets (chocolate, ice cream, etc.) or the "hidden sugar" (bread, cereal, crackers, mayo, ketchup, spaghetti sauce, etc.) I certainly craved the desserts more, but the "regular food" was hardest to avoid. I was hard pressed to find food that I could eat.
And that surprised me a little bit.
For example, let's say you, like me, are "good about sugar." You don't drink soda, you don't munch candy bars, you dislike Pop Tarts, and love most any veggie. Great. Let's create a example menu and see what the sugar content is.
Breakfast: Granola
Lunch: Peanut Butter and Jelly Sandwich
Supper: Lasagna, Salad, and Rolls (let's say you're good and you skip dessert)
Sounds okay, right?
That's what I thought before these past two weeks. But I can't argue with the math.
The math says that (depending on what brands and how many helpings you have), this menu supplies you with - are you ready? - 52 grams of refined sugar.
100 grams sugar = 20 tsp. sugar
So, 52 grams is about 10 tsp. .....
That's almost 1/4 cup of sugar.
Picture a quarter cup of sugar dumped onto the table. Now pick that up and ingest it.
And we thought we were "good with sugar"?
Enough with the depressing news.
Anyway - so my eyes were opened to the way sugar has invaded my diet. But I also learned that skipping dessert is possible.
And I learned all sorts of ways to sweeten food naturally. ...But I'm kinda sick of raisins. :) :) :)
All in all, I'm glad I did these two weeks. I feel good about it.
How will I eat tomorrow?
Well, my tongue craves some old-fashioned granola and chocolate, but my mind feels a little sick at the thought of what that means for my body. One TBS of sugar sounds like a TON. I think I view sugar in a whole different light now. Hopefully that lasts for awhile. I will definitely be looking into ways to limit my sugar, but I don't think I'll go cold-turkey. At least not yet.
How do you think a sugar fast would affect you if you did one?
Disclaimer:
I didn't go 2 weeks without eating refined sugar.
You know, of course, that I was allowing myself 1 meal each week to eat whatever I liked. I did that on Friday night for both weeks. I had pizza and ice cream, and one week I had a sip of Joe Beans' Iced Mocha as well. Mmmm!
Those were my permissible flumps. (Don't you like that word? I just made it up!)
I had a few other Cheat Moments.
#1 - The homemade chocolate cheesecake at a friend's party last Saturday. I held out through the cookies. And the chocolate raspberry truffles. And the pizza sauce for dipping the Stromboli. But when they sliced the cheesecake....I said "who cares?" and ate a small (very rich!) piece. Oh, It. Was. That. Good.
#2 - I ate a few dried dates that had sugar on them. (Honestly - who in the world thinks they need to sweeten dried dates, of all things? As if they weren't sweet enough?)
#3 - I almost gave in yesterday when Mom served fudge pie for Sunday dinner dessert. The only thing that kept me strong was knowing I'd have to blog about my naughtiness. (I knew there was something to the accountability theory!)
So, what did I observe, and what did I learn?
Well, I'm not sure which was hardest to abstain from; the known sweets (chocolate, ice cream, etc.) or the "hidden sugar" (bread, cereal, crackers, mayo, ketchup, spaghetti sauce, etc.) I certainly craved the desserts more, but the "regular food" was hardest to avoid. I was hard pressed to find food that I could eat.
And that surprised me a little bit.
For example, let's say you, like me, are "good about sugar." You don't drink soda, you don't munch candy bars, you dislike Pop Tarts, and love most any veggie. Great. Let's create a example menu and see what the sugar content is.
Breakfast: Granola
Lunch: Peanut Butter and Jelly Sandwich
Supper: Lasagna, Salad, and Rolls (let's say you're good and you skip dessert)
Sounds okay, right?
That's what I thought before these past two weeks. But I can't argue with the math.
The math says that (depending on what brands and how many helpings you have), this menu supplies you with - are you ready? - 52 grams of refined sugar.
100 grams sugar = 20 tsp. sugar
So, 52 grams is about 10 tsp. .....
That's almost 1/4 cup of sugar.
Picture a quarter cup of sugar dumped onto the table. Now pick that up and ingest it.
And we thought we were "good with sugar"?
Enough with the depressing news.
Anyway - so my eyes were opened to the way sugar has invaded my diet. But I also learned that skipping dessert is possible.
And I learned all sorts of ways to sweeten food naturally. ...But I'm kinda sick of raisins. :) :) :)
All in all, I'm glad I did these two weeks. I feel good about it.
How will I eat tomorrow?
Well, my tongue craves some old-fashioned granola and chocolate, but my mind feels a little sick at the thought of what that means for my body. One TBS of sugar sounds like a TON. I think I view sugar in a whole different light now. Hopefully that lasts for awhile. I will definitely be looking into ways to limit my sugar, but I don't think I'll go cold-turkey. At least not yet.
How do you think a sugar fast would affect you if you did one?
Wednesday, October 19, 2011
Two Flavors
So....yesterday night was hard.
Supper was green beans, rice, and slow cooker chicken. It was yummy! The chicken was especially good, and I enjoyed a whole leg, which is a lot for me. I usually have just a bite or two of meat with my meal. (Yeah, I know that's pitiful.) I knew I didn't need to save room for dessert, so I filled up. I even had seconds on rice, which is another unusual occurrence for me. (I've developed a habit of skimping on the good food so I have plenty of room for a big dessert. One reason I knew I needed to do this "sugar fast." ...This look even worse in print.)
At the end of the meal, my tummy was full, but my tongue wasn't. I roamed the kitchen like a crazy girl, looking for something sweet I could eat. I'm so accustomed to that sweetness to finish off a meal! I finally settled for a dried fig.
Here's a list of foods to help satisfy that sweet ache:
Raisins
Dried figs or prunes
Dried fruit, if there's no sugar added (hard to find, with some brands)
Blueberries, 'specially good if they're frozen
Strawberries
Nuts can help, too, though they aren't sweet
I've come to a definite conclusion. Americans are programed to enjoy only two taste sensations; sweetness and saltiness.
Think about it - almost every food we eat has sugar added, from pizza sauce to bread. The foods that aren't sugar-enhanced are the savory type, and they all have salt added. Canned veggies, soups, lunch meat, chips, etc., all taste strongly of salt, but unless you're used to eating those foods without salt, you don't notice that flavor. The flavor you expect from canned beets, for instance, comes mainly from the salt in the can. We think that's "beet taste," but if you cook up a garden beet and eat it, then take a bite of canned beets, you immediately notice that you aren't tasting true "beet" from the can. You're tasting salt. Our tongues automatically expect to taste either sugar or salt in every mouthful of food we eat. We don't even notice it any more. We think salt or sugar equals flavor.
Even if salt and sugar wasn't so disastrous for your health, wouldn't this still be a sad state of affairs? There are MILLIONS of flavors in the world - why mask them with the two we've been programmed to like best? These other flavors are milder, and with a tongue accustomed to the strong bite of salt and the pervasiveness of sugar, it's hard to pick up any deep taste, but once you avoid sugar and salt for awhile, I've been told you taste everything else much better.
Wouldn't it be worth it to avoid two flavors for the sake of experiencing zillions of others in their place?
...Not that I'm ready to give up salt and sugar entirely. I think some in moderation is enjoyable. But I am hoping that through my "experiment" these two weeks I will be able to enjoy some richer flavor in the foods I eat.
What do you think? Are we over-salted-and-sweeted?
Supper was green beans, rice, and slow cooker chicken. It was yummy! The chicken was especially good, and I enjoyed a whole leg, which is a lot for me. I usually have just a bite or two of meat with my meal. (Yeah, I know that's pitiful.) I knew I didn't need to save room for dessert, so I filled up. I even had seconds on rice, which is another unusual occurrence for me. (I've developed a habit of skimping on the good food so I have plenty of room for a big dessert. One reason I knew I needed to do this "sugar fast." ...This look even worse in print.)
At the end of the meal, my tummy was full, but my tongue wasn't. I roamed the kitchen like a crazy girl, looking for something sweet I could eat. I'm so accustomed to that sweetness to finish off a meal! I finally settled for a dried fig.
Here's a list of foods to help satisfy that sweet ache:
Raisins
Dried figs or prunes
Dried fruit, if there's no sugar added (hard to find, with some brands)
Blueberries, 'specially good if they're frozen
Strawberries
Nuts can help, too, though they aren't sweet
I've come to a definite conclusion. Americans are programed to enjoy only two taste sensations; sweetness and saltiness.
Think about it - almost every food we eat has sugar added, from pizza sauce to bread. The foods that aren't sugar-enhanced are the savory type, and they all have salt added. Canned veggies, soups, lunch meat, chips, etc., all taste strongly of salt, but unless you're used to eating those foods without salt, you don't notice that flavor. The flavor you expect from canned beets, for instance, comes mainly from the salt in the can. We think that's "beet taste," but if you cook up a garden beet and eat it, then take a bite of canned beets, you immediately notice that you aren't tasting true "beet" from the can. You're tasting salt. Our tongues automatically expect to taste either sugar or salt in every mouthful of food we eat. We don't even notice it any more. We think salt or sugar equals flavor.
Even if salt and sugar wasn't so disastrous for your health, wouldn't this still be a sad state of affairs? There are MILLIONS of flavors in the world - why mask them with the two we've been programmed to like best? These other flavors are milder, and with a tongue accustomed to the strong bite of salt and the pervasiveness of sugar, it's hard to pick up any deep taste, but once you avoid sugar and salt for awhile, I've been told you taste everything else much better.
Wouldn't it be worth it to avoid two flavors for the sake of experiencing zillions of others in their place?
...Not that I'm ready to give up salt and sugar entirely. I think some in moderation is enjoyable. But I am hoping that through my "experiment" these two weeks I will be able to enjoy some richer flavor in the foods I eat.
What do you think? Are we over-salted-and-sweeted?
Tuesday, October 18, 2011
Sweet Overkill
The USDA reports that the average American consumes anywhere between 150 to 170 pounds of refined sugars (this includes glucose, fructose, and sucrose) in one year.
That's a lot of sugar.
What does 150-170 pounds look like? Imagine 30 to 34 five-pound bags of sugar lined up next to each other on a counter. Now imagine eating all of that sugar. To break it down even more, eating 150-170 pounds of sugar in one year is also equivalent to consuming 1/4 to 1/2 pounds of sugar each day.
1/4 pound of sugar is equivalent to 30 teaspoons and 1/2 pound of sugar is equivalent to 60 teaspoons.
Studies have shown that consuming 75 to 100 grams of simple sugars (about 20 teaspoons of sugar - the amount found in two-and-a-half average 12 ounce cans of soda) can suppress the body's immune responses considerably. These sugars are known to create a 40 to 50% percent drop in the ability of white blood cells to kill bacteria and germs within the body. The immune-suppressing effect of sugar starts less than thirty minutes after ingestion and may last for five hours. By consuming 150 to 170 pounds of simple sugars each year, a person may have up to 80,000 hours of immune suppression!
(These facts were taken from: http://EzineArticles.com/2252026)
No wonder we are a sick society. And this isn't even taking into consideration that other effects of sugar - it's the leading cause of dental problems, and we all know what sugar can do to children's attention spans. There are studies that show that sugar feeds cancer cells, and causes heart problems.
Enough already.
I've always known sugar is bad for you. Refined sugar, that is. I know we need a little sugar in our bodies - it actually feeds the brain, I've been told. But that's natural sugar - the kind found in fruits, honey, and molasses. Refined sugars (white sugar, brown sugar, high fructose corn syrup, etc.) is not at all necessary. Your body survives much better without it.
As I said, I've known that for ages. I've tried to watch how much refined sugar I eat, and I thought I did pretty good. At 6 or 7 years old, I was famous in Sunday school for refusing any candy offered me. (Yes - you can say it...."health nut!")
Lately, however, I've gotten sloppy. My trouble with low blood sugar flared up again this year, and it just seems too easy to eat a few chocolate chips mid-morning, or nibble a piece of chocolate before bed. I've always loved ice cream. Chocolate chip cookies? Mmmmm! And my real weakness is "real food" that is chocked-full of sugar. Sweet potato casserole. Quick breads. Especially quick breads. Pumpkin bread, banana bread - you name it, I'll eat it 'til the cows come home.
And don't forget granola. That stuff could be served breakfast, lunch, and dinner, and I wouldn't complain.
All that has lots of sugar. It's addictive. Sugar is addictive. And yet it's so bad for you.
Wow. Now why does that sentence remind me of sin?
I can't snap my fingers and remove all the sin in my life, but I can try to do something about this sugar thing. I've become motivated to see if I can go for two weeks without putting any refined sugar in my body.
Do you have any idea how hard that can be in America? That not only means no chocolate or ice cream, but also no spaghetti sauce, salad dressings, store-bought bread, or granola!
Of course, there's still plenty left to choose from. God's a creative Creator, and He made plenty of "real" food that is delicious. It will be hard, but I fully believe it's possible. That's why I'm going to do it.
Two weeks. Cold Turkey. Nit-picky. Starting today.
Now for the big question - will you join me?
I'd love some accountability. And some companionship. Somebody to say "keep going!" and to tell me I'm not crazy.
Maybe cold turkey is a little much for you - but what about making a smaller commitment for these two weeks? Maybe you'll skip dessert every day. Or drink your coffee black. Anything to show us you're challenging yourself!
If you decide to do a challenge for these two weeks (Oct. 18- Nov. 1), please post a comment and tell us what it is.
If you want to join the same challenge I'm doing, let me tell you the rules I'm giving myself:
1 - The obvious; no refined sugars. This means I read the labels on everything, and if it contains any unnatural sugars, it's a no-no. I have a feeling I'll be eating a lot of from-scratch foods for awhile. :)
2 - You can "cheat" on one meal each week. (Don't you love making up your own rules?) I already know which meal I'm going to "cheat" on; Friday nights. It's our family pizza night, and I'd hate to miss out on that!
3 - Don't starve yourself. Be sure to fill up on good foods.
So what can we eat? Lots! Oatmeal sweetened with molasses and raisins, homemade bread made with honey, vegetables, baked potatoes, cheese, sour cream, apples, oranges, bananas, beans, noodles with herbs and butter, carrots, grilled chicken, meatloaf, fried potatoes, tuna-cheese-butter-and-lettuce sandwiches, hard boiled eggs, ...and much more!
If you discover a "hidden" source of sugar, that some of us might over look (like ketchup or BBQ sauce) post a comment to remind us! And be sure to post a comment if you join the challenge.
If you feel like it, post about the challenge on your own blog, to keep up your spirits.
On of the best parts about this challenge, I think, will be the new recipes we come up with. I've created one already! I had it for breakfast this morning. Shall I share?
Oven-baked French Toast
- 4 homemade rolls
- 2 eggs, slightly beaten
- 1/2 cup or so of milk
- lots of cinnamon
- 2 TBS molasses
- 1 TBS honey
- 1 TBS water
Slice the rolls into 1/4" slices. Layer in a 9x9 glass baking dish. Combine eggs, milk, and cinnamon. Pour over bread. Mix molasses, honey, and water. Drizzle evenly over bread. Cover and refrigerate overnight. In the morning, bake at 350 for 20 minutes, or until eggs set. Don't over bake.
This was delicious as-is; sorta like cinnamon french bread on the bottom, and gingerbread cookies softened in milk on the top, but next time I might add a TBS of melted butter to the molasses mixture, and pour it all in the bottom of the dish before I add the bread, eggs, and milk.
I'm also sprouting 1 1/2 cups of navy beans for a recipe later in the week. Start today if you want to try it! Sprouting is easy. ...but this post is long enough, so I won't give detailed instructions. Just google it. :)
Anyway....I am holding my breath for comments! Remember, if you meet this challenge, you've just escaped 3 1/2 POUNDS of sugar (or 420 tsp.) that would have been in your body if you ate the normal 1/4 pound a day.
Let's do it, folks!
Thursday, September 29, 2011
"How to Cook Chinese/Japanese/ Filipino food at home"
To be honest, I don't know which this recipe is. The rice bit is (with minor adjustments by me) from my aunt , who is Filipino, but the rest is just what I thought smelled good and looked oriental. And it tastes FANTASTIC, if I may say so myself. A friend of mine saw this dish once and thought I had ordered it from a Japanese restaurant. And it must be sorta kinda authentic, since part of it came from my aunt, right?
I've never had restaurant-style oriental food (only dishes made by people from those countries - lucky me!), so I don't know if this tastes like what you would buy in a Japanese or Chinese restaurant. Make it yourself and tell me.
This recipe below makes one serving. Multiply it according to how many people you need to feed. Of course, like most cooking, it's very flexible. Add a little extra rice to make it stretch. Skimp on an egg or two if you don't have enough. And so on and so forth.
So...Here we go: (And, once again, I apologize for how wordy my recipes are. Can't help it!)
Orient Rice, Amber-Style
~ minced garlic (the kind you buy in a little jar in its own juice is so convenient! ...But you could chop fresh garlic too. Just be sure to chop tiny.)
~ 2 TBS butter, or a little less. Maybe 1 1/2 TBS
~ 1/2 cup cooked brown rice, one day old (the age is important so that it's not too moist.)
~ 1 egg (home-raised is best!)
~ 2 TBS ground beef, cooked with onions (Is your family like mine, where you cook up a bunch of ground beef with onions at one time, early in the week, and use it throughout the week for spaghetti, sloppy joes, soups, casseroles, etc.? I just grabbed a little bit from the fridge.)
~ 1 tsp. soy sauce (Please do measure this - just 1 tsp. is enough! Ever read the back of the bottle? 1 TBS gives you 38% of your daily salt allowance!)
~ 1 large carrot, scrubbed
~ 1/2 of one large green sweet pepper (fresh from the garden is delightful!)
Are you ready?
Directions: (Note - you will be making two parts for this dish - rice, and fried vegetables to go on top. Make the rice first and keep it warm, or, if you're talented, get the veggies going, and when they're almost done start the rice.)
Rice Directions:
Melt some of the butter (3/4 TBS or less) in a small frying pan. Once it is melted, turn your heat down to simmer and add a small scoop (1/4 tsp. or so, to taste) of minced garlic. Let that saute until the garlic is soft and smells wonderful. Don't let the butter get too brown. Keeping the heat low is key. Think slow cooking.
Add the cooked meat, and toss to coat in butter. Let it heat for a few moments. Turn the heat up to medium. Once it reaches the heat level you would use to cook eggs, continue.
Now, you want to do the next three additions quickly, so have them all ready. Have your rice measured out and ready to dump in, plus 3/4 tsp. of soy sauce and one egg.
Add the egg to the skillet and stir with a wooden spoon. You're making scrambled eggs. As soon as the egg starts to cook, add the rice and soy sauce. Stir continuously as the egg cooks. You want the rice to fry, but you don't want the egg to over-cook and be rubbery. Find that perfect moment of "doneness." And remember, eggs always continue to cook in their own heat once you take them off the stove, so stop a few moments before you think they're done.
Now, set the rice aside, but keep it warm until your veggie topping is ready.
Fried Vegetables Directions:
Chop your carrot and green pepper into 2.5" lengths. Then slice the pieces into strips. The strips should be thin, like a lasagna noodle, and about 1/4" wide. Now melt your remaining butter in a larger fry pan, and saute a small amount of garlic until soft. Turn heat up to medium. Add remaining soy sauce (about 1/4 tsp.) and the carrots. Let the carrots cook for 2-3 minutes, to give them a head start, since they're crisper, and then add the green pepper. Fry until the veggies are soft and limp, and just starting to caramelize around the edges. (Mmmmm!) Remove from heat and serve over the rice.
Try to restrain yourself.
Enjoy!
I've never had restaurant-style oriental food (only dishes made by people from those countries - lucky me!), so I don't know if this tastes like what you would buy in a Japanese or Chinese restaurant. Make it yourself and tell me.
This recipe below makes one serving. Multiply it according to how many people you need to feed. Of course, like most cooking, it's very flexible. Add a little extra rice to make it stretch. Skimp on an egg or two if you don't have enough. And so on and so forth.
So...Here we go: (And, once again, I apologize for how wordy my recipes are. Can't help it!)
Orient Rice, Amber-Style
~ minced garlic (the kind you buy in a little jar in its own juice is so convenient! ...But you could chop fresh garlic too. Just be sure to chop tiny.)
~ 2 TBS butter, or a little less. Maybe 1 1/2 TBS
~ 1/2 cup cooked brown rice, one day old (the age is important so that it's not too moist.)
~ 1 egg (home-raised is best!)
~ 2 TBS ground beef, cooked with onions (Is your family like mine, where you cook up a bunch of ground beef with onions at one time, early in the week, and use it throughout the week for spaghetti, sloppy joes, soups, casseroles, etc.? I just grabbed a little bit from the fridge.)
~ 1 tsp. soy sauce (Please do measure this - just 1 tsp. is enough! Ever read the back of the bottle? 1 TBS gives you 38% of your daily salt allowance!)
~ 1 large carrot, scrubbed
~ 1/2 of one large green sweet pepper (fresh from the garden is delightful!)
Are you ready?
Directions: (Note - you will be making two parts for this dish - rice, and fried vegetables to go on top. Make the rice first and keep it warm, or, if you're talented, get the veggies going, and when they're almost done start the rice.)
Rice Directions:
Melt some of the butter (3/4 TBS or less) in a small frying pan. Once it is melted, turn your heat down to simmer and add a small scoop (1/4 tsp. or so, to taste) of minced garlic. Let that saute until the garlic is soft and smells wonderful. Don't let the butter get too brown. Keeping the heat low is key. Think slow cooking.
Add the cooked meat, and toss to coat in butter. Let it heat for a few moments. Turn the heat up to medium. Once it reaches the heat level you would use to cook eggs, continue.
Now, you want to do the next three additions quickly, so have them all ready. Have your rice measured out and ready to dump in, plus 3/4 tsp. of soy sauce and one egg.
Add the egg to the skillet and stir with a wooden spoon. You're making scrambled eggs. As soon as the egg starts to cook, add the rice and soy sauce. Stir continuously as the egg cooks. You want the rice to fry, but you don't want the egg to over-cook and be rubbery. Find that perfect moment of "doneness." And remember, eggs always continue to cook in their own heat once you take them off the stove, so stop a few moments before you think they're done.
Now, set the rice aside, but keep it warm until your veggie topping is ready.
Fried Vegetables Directions:
Chop your carrot and green pepper into 2.5" lengths. Then slice the pieces into strips. The strips should be thin, like a lasagna noodle, and about 1/4" wide. Now melt your remaining butter in a larger fry pan, and saute a small amount of garlic until soft. Turn heat up to medium. Add remaining soy sauce (about 1/4 tsp.) and the carrots. Let the carrots cook for 2-3 minutes, to give them a head start, since they're crisper, and then add the green pepper. Fry until the veggies are soft and limp, and just starting to caramelize around the edges. (Mmmmm!) Remove from heat and serve over the rice.
Try to restrain yourself.
Enjoy!
Tuesday, July 12, 2011
DELIGHTFUL Chocolate
It's late, and I really shouldn't be posting, but I HAD to share this one recipe with y'all. It's another Amber creation...
Amber's Brownie Sandwiches
(Isn't the name enough to make your mouth water?)
4 (1 oz.) squares of semi-sweet baking chocolate
2 TBS Butter
1 tsp vanilla
1/3 cup packed brown sugar
1 egg
1/8 tsp baking powder
1/3 cup flour (I think....it was somewhere between 1/4 and 1/2...Sorry! It all comes, as Pooh Bear would say, of baking too much without writing down the ingredients as you go...)
Coarsely chop the chocolate. Place in micro-wave safe bowl with butter and bake on high for 1 minute. Remove, and stir until chocolate is smooth and completely melted. Add vanilla, sugar, and egg. Stir until smooth. Add powder and flour, and stir. Add a touch more flour if you think it's too soupy....but it's supposed to be soupy. Like cake batter.
Pour into grease cookie pan, with sides....um, I used an odd size. Not a 9x13...smaller...but not a 9x9. ...Can you tell this recipe wasn't planned? Batter should be spread thinly, but not so thin you can see the pan through the batter. Almost, but not quite.
Anyway, bake at 350 for about 10 minutes, or until just barely pulling away from sides of pan. Remove and let cool. Will harden as it cools, until it's stiff, like a cookie or wafer. (But if you over-cooked it, it will be HARD, like rock!) Cut into 1.5" squares.
Making Filling:
2 oz. cream cheese
1 TBS milk chocolate chips
1 TBS powdered sugar
Melt cream cheese and chocolate chips in microwave-safe bowl - about 15 seconds. Do not over cook. Stir until smooth and completely melted. Add sugar. Stir.
Use frosting and wafers to make mini sandwiches. Refrigerate until filling becomes firm again.
Eat.
Try not to eat too many.
Sorry for the odd directions. But I didn't want you to miss out on a good treat.
And no picture. They didn't last long enough.
I've discovered something....
...I used to think that hype about "caffeine addiction" was nuts.
It's not.
I'm officially addicted to chocolate.
I'm serious.
What should I do? Try to break it? Or feed it?
How 'bout control it? Just bits at a time?
Yeah. That sounds good. :)
Amber's Brownie Sandwiches
(Isn't the name enough to make your mouth water?)
4 (1 oz.) squares of semi-sweet baking chocolate
2 TBS Butter
1 tsp vanilla
1/3 cup packed brown sugar
1 egg
1/8 tsp baking powder
1/3 cup flour (I think....it was somewhere between 1/4 and 1/2...Sorry! It all comes, as Pooh Bear would say, of baking too much without writing down the ingredients as you go...)
Coarsely chop the chocolate. Place in micro-wave safe bowl with butter and bake on high for 1 minute. Remove, and stir until chocolate is smooth and completely melted. Add vanilla, sugar, and egg. Stir until smooth. Add powder and flour, and stir. Add a touch more flour if you think it's too soupy....but it's supposed to be soupy. Like cake batter.
Pour into grease cookie pan, with sides....um, I used an odd size. Not a 9x13...smaller...but not a 9x9. ...Can you tell this recipe wasn't planned? Batter should be spread thinly, but not so thin you can see the pan through the batter. Almost, but not quite.
Anyway, bake at 350 for about 10 minutes, or until just barely pulling away from sides of pan. Remove and let cool. Will harden as it cools, until it's stiff, like a cookie or wafer. (But if you over-cooked it, it will be HARD, like rock!) Cut into 1.5" squares.
Making Filling:
2 oz. cream cheese
1 TBS milk chocolate chips
1 TBS powdered sugar
Melt cream cheese and chocolate chips in microwave-safe bowl - about 15 seconds. Do not over cook. Stir until smooth and completely melted. Add sugar. Stir.
Use frosting and wafers to make mini sandwiches. Refrigerate until filling becomes firm again.
Eat.
Try not to eat too many.
Sorry for the odd directions. But I didn't want you to miss out on a good treat.
And no picture. They didn't last long enough.
I've discovered something....
...I used to think that hype about "caffeine addiction" was nuts.
It's not.
I'm officially addicted to chocolate.
I'm serious.
What should I do? Try to break it? Or feed it?
How 'bout control it? Just bits at a time?
Yeah. That sounds good. :)
Tuesday, June 7, 2011
Highly Recommended
Hey, folks!
For those of you who get tired waiting for me to pop around and write my next blog post, I'd like to recommend a fun cooking/budgeting blog for you to read in the meantime: Once a Month Shopping for Couples.

Don't let the title fool you; you don't have to be married to read it. If you like to cook, you'll enjoy this blog. Nice pictures, yummy treats, witty writing, and a blog author who has a wonderful personality.
Did I mention she's related to me?
Go on over and check out my sister's blog. Heather will be delighted to see you; she's always been good at hospitality.
P.S. (One disclaimer; though I LOVE devouring her treats, she's never been known to skimp on the sugar. :) :) :) But, hey, we all need a little sweetness in our lives!)
For those of you who get tired waiting for me to pop around and write my next blog post, I'd like to recommend a fun cooking/budgeting blog for you to read in the meantime: Once a Month Shopping for Couples.
Don't let the title fool you; you don't have to be married to read it. If you like to cook, you'll enjoy this blog. Nice pictures, yummy treats, witty writing, and a blog author who has a wonderful personality.
Did I mention she's related to me?
Go on over and check out my sister's blog. Heather will be delighted to see you; she's always been good at hospitality.
P.S. (One disclaimer; though I LOVE devouring her treats, she's never been known to skimp on the sugar. :) :) :) But, hey, we all need a little sweetness in our lives!)
Thursday, March 24, 2011
Hello, and a Recipe for Banana Cake
I'm sure you all thought I'd dropped off the face of the planet, but the truth is that I took a vacation from blogging for awhile. Sorry that I didn't give you any notice. Ever have those times where you just want to break free from all the Internet expectations? Disappear from the web world? Not check your email for days at a time? Forget you have a blog? Ignore facebook updates?
Yup.
I wasn't brave enough to do all those at once, but the blog dropped to the sidelines for awhile.
Now I'm back, and feeling more inspired than ever! I have a list of posts to write, and an idea for a new series, once I finish the last post of my "Starting a Web-based Business" series. (See - I didn't forget!)
My fingers are feeling awkward. I can tell it's been awhile since I blogged. Thoughts aren't flowing in a logical manner. Give me a few posts, and I'll be back to normal.
Let's stick with an easy post to break me in again; a recipe.
 Isn't it beautiful? I think so, anyway. It was delicious, too. This is a banana cake, with peanut butter cream filling, and real whipped cream and walnuts on top.
Peanut butter and banana, you say? Don't tell me you've never heard of that combo. It's deLIGHTful! We eat peanut butter and banana sandwiches all the time. (Spread a slice of bread with peanut butter, add a banana in the middle like a hot dog, fold up the bread slice like a bun...mmmmm!)
The cake is from scratch, of course, and is one of the nicest from-scratch cakes I've ever made. It's SUPER easy to throw together. This is an old family-favorite (is 5-6 years old?) but we usually make it in a 9x13 pan, and eat it plain or with a bit of cream cheese frosting, if we're feeling extra sweet-hungry.
But, if I remember correctly, the last time I made this cake (and took pictures) the day was two of my sibling's spiritual birthdays, and I wanted to do something special. So I made it like a "birthday cake."
The cake is a little moister when made in a 9x13 - either because it's slightly thicker that way, or I over-baked the circle pans by a few minutes. Not sure which reason is correct. But it was still mighty good stacked in layers! The filling and frosting were yummy.
It's been awhile since you read one of my long-winded recipes, with all my little comments and rabbit trails. Are you ready?

Banana-Nut Cake - the best! (title copied exactly, from my faded recipe card)
2/3 cup shortening or softened butter (I prefer butter, for health reasons.)
2 1/2 cup flour (measurement is for unbleached white flour. If using whole wheat, use slightly less flour, or your batter will be too heavy)
1 cup packed brown sugar (would you believe you could make a cake with one cup of sugar? Of course, the original recipe called for more...but I tweaked it, and I think it's still great - 'specially if you use really old bananas, which are naturally very sweet.)
1 1/4 tsp. baking powder
1 tsp. baking soda
1 tsp. salt
1 1/4 cup mashed bananas (about 3 bananas)
2/3 cup buttermilk (I used kefir. Remind me to do a post sometime on how much I like that stuff!)
2 eggs (fresh from our chickens!)
2/3 cups chopped walnuts (or almonds, if you want to spend a little more.)
1 tsp. imitation vanilla extract
Whew. Who would have believed a list of ingredients could take so many words? :) :) Now on to the directions.
Stir butter/shortening to soften. Sift in dry ingredients. Add bananas and half of buttermilk/kefir. (By the way, if you thinly slice the bananas before mashing them, it's a lot faster!) Mix well. Add rest of buttermilk, eggs, and vanilla. (Don't over-beat the mixture once the eggs and buttermilk are in it, or you'll get cracks in your cake and it won't rise as high.) Mix gently. Fold in 1/3 cup of nuts.
Bake in greased and floured pans (two 9" cake pans, or one 9x13" pan) at 350 degrees for 30-35 minutes, or until done in center. Don't over bake.
*Tip: If you use 9" cake pans, wrap a strip of flannel, as wide as the pan is tall, around the outside of the pan, and pin with a clothespin. It is oven-safe, and will make your cake stay level, instead of rising just in the center, and giving you a "mountain effect." Cool, huh?
Frosting and Filling Recipe:
This is hard to recall, because I didn't measure anything. But I think it was something like:
1-2 cups heavy whipping cream
1/4 cup powdered sugar
1/4 cup peanut butter
The first thing to do is whip the cream. Put it in a mixing bowl, add the powdered sugar, and whip it until it forms peaks.
Next, put all the whipped cream in a separate bowl, and put the peanut butter in the mixing bowl. Whip it to make it soft. Add a few scoops of cream, and fold it into the peanut butter as gently as you can. It will probably deflate some. Add a little more cream, folding it in again. The whole point is to mix about 1/2 of the whipped cream into the peanut butter, with as little damage to the cream as possible. Once you're done, wala! That's it! You have peanut butter cream filling. The leftover whipped cream and 1/2 the nuts from the recipe are for topping the cake.
Well, that's my post for today. Hopefully you'll be seeing more of me. I'm glad to be back! Did you miss me, with all my lovely word-y-ness? :) :) :)
Yup.
I wasn't brave enough to do all those at once, but the blog dropped to the sidelines for awhile.
Now I'm back, and feeling more inspired than ever! I have a list of posts to write, and an idea for a new series, once I finish the last post of my "Starting a Web-based Business" series. (See - I didn't forget!)
My fingers are feeling awkward. I can tell it's been awhile since I blogged. Thoughts aren't flowing in a logical manner. Give me a few posts, and I'll be back to normal.
Let's stick with an easy post to break me in again; a recipe.
 Isn't it beautiful? I think so, anyway. It was delicious, too. This is a banana cake, with peanut butter cream filling, and real whipped cream and walnuts on top.
Peanut butter and banana, you say? Don't tell me you've never heard of that combo. It's deLIGHTful! We eat peanut butter and banana sandwiches all the time. (Spread a slice of bread with peanut butter, add a banana in the middle like a hot dog, fold up the bread slice like a bun...mmmmm!)
The cake is from scratch, of course, and is one of the nicest from-scratch cakes I've ever made. It's SUPER easy to throw together. This is an old family-favorite (is 5-6 years old?) but we usually make it in a 9x13 pan, and eat it plain or with a bit of cream cheese frosting, if we're feeling extra sweet-hungry.
But, if I remember correctly, the last time I made this cake (and took pictures) the day was two of my sibling's spiritual birthdays, and I wanted to do something special. So I made it like a "birthday cake."
The cake is a little moister when made in a 9x13 - either because it's slightly thicker that way, or I over-baked the circle pans by a few minutes. Not sure which reason is correct. But it was still mighty good stacked in layers! The filling and frosting were yummy.
It's been awhile since you read one of my long-winded recipes, with all my little comments and rabbit trails. Are you ready?

Banana-Nut Cake - the best! (title copied exactly, from my faded recipe card)
2/3 cup shortening or softened butter (I prefer butter, for health reasons.)
2 1/2 cup flour (measurement is for unbleached white flour. If using whole wheat, use slightly less flour, or your batter will be too heavy)
1 cup packed brown sugar (would you believe you could make a cake with one cup of sugar? Of course, the original recipe called for more...but I tweaked it, and I think it's still great - 'specially if you use really old bananas, which are naturally very sweet.)
1 1/4 tsp. baking powder
1 tsp. baking soda
1 tsp. salt
1 1/4 cup mashed bananas (about 3 bananas)
2/3 cup buttermilk (I used kefir. Remind me to do a post sometime on how much I like that stuff!)
2 eggs (fresh from our chickens!)
2/3 cups chopped walnuts (or almonds, if you want to spend a little more.)
1 tsp. imitation vanilla extract
Whew. Who would have believed a list of ingredients could take so many words? :) :) Now on to the directions.
Stir butter/shortening to soften. Sift in dry ingredients. Add bananas and half of buttermilk/kefir. (By the way, if you thinly slice the bananas before mashing them, it's a lot faster!) Mix well. Add rest of buttermilk, eggs, and vanilla. (Don't over-beat the mixture once the eggs and buttermilk are in it, or you'll get cracks in your cake and it won't rise as high.) Mix gently. Fold in 1/3 cup of nuts.
Bake in greased and floured pans (two 9" cake pans, or one 9x13" pan) at 350 degrees for 30-35 minutes, or until done in center. Don't over bake.
*Tip: If you use 9" cake pans, wrap a strip of flannel, as wide as the pan is tall, around the outside of the pan, and pin with a clothespin. It is oven-safe, and will make your cake stay level, instead of rising just in the center, and giving you a "mountain effect." Cool, huh?
Frosting and Filling Recipe:
This is hard to recall, because I didn't measure anything. But I think it was something like:
1-2 cups heavy whipping cream
1/4 cup powdered sugar
1/4 cup peanut butter
The first thing to do is whip the cream. Put it in a mixing bowl, add the powdered sugar, and whip it until it forms peaks.
Next, put all the whipped cream in a separate bowl, and put the peanut butter in the mixing bowl. Whip it to make it soft. Add a few scoops of cream, and fold it into the peanut butter as gently as you can. It will probably deflate some. Add a little more cream, folding it in again. The whole point is to mix about 1/2 of the whipped cream into the peanut butter, with as little damage to the cream as possible. Once you're done, wala! That's it! You have peanut butter cream filling. The leftover whipped cream and 1/2 the nuts from the recipe are for topping the cake.
Well, that's my post for today. Hopefully you'll be seeing more of me. I'm glad to be back! Did you miss me, with all my lovely word-y-ness? :) :) :)
Saturday, January 22, 2011
Sweet Potato Coffee Pie
I want to share a recipe with you, but first I have to brag on my brothers a bit. They made supper for us the other night; not a common occurrence, but one that we enjoy whenever Mom decides it's time to assign them a meal.
Potato soup was the menu, with apple pie for dessert. But not just plain old soup and pie. This soup was creamy, and cheesy, and thick, and savory, and oh so good! The pie was high and golden and sweet...extremely good pie crust, 'specially considering that it was Curtis' first time making a pie.
I took a picture, and Justin said, "Are you going to put that on your blog?"
I said, "I might. Think I should?"
"Yup," he replied.
"Want me to brag on my brothers a bit, huh?" I smiled.
He just grinned.
And so, swelling with pride, I present the photo:

Now for the recipe. This is another one that I made up, so if you hate it, there's no one to blame but me. :)
But I don't think you'll hate it. Not if you like pumpkin pie. Or brown sugar. Or nuts. Or cinnamon. Or sweet potato casserole.
Sound good? Let's continue.
To begin with, this was going to be sweet-potato-cinnamon-rolls, made almost exactly like normal sweet cinnamon rolls, for breakfast. But one thing led to another, and I decided to aim for coffee cake instead. The finished product turned out more like pie than cake, however, so I have dubbed it "Coffee Pie." I know it sounds nothing like what it is, but, hey, I made it - I name it. :)
This Coffee Pie is really a thin, very moist cake. With crumble topping. The stuff is sweet, but not too sweet. Would you believe I could make two 9" coffee pies with only half a cup of brown sugar? It's true! You would never guess it is only that bit of sugar, when you're eating the cakes.
Ahem. I mean pies.
I have a confession; I've only made this recipe once, so it may still need a bit of tweaking. But if I wait for that, I'll never post it, so I'll offer it as-is. It's pretty tasty that way.
Without further rambling:
Amber's Sweet Potato Coffee Pie
 Oh - wait - one more thing. (Sorry!) This recipe is great for being made ahead of time, to save you time when you're fumbling around the kitchen in the morning because you overslept.
Well, it's actually best warm (I think - it didn't last 'til it cooled), but you can mix the ingredients ahead of time. I'll show you:
In a large mixing bowl, combine dry ingredients:
2 cups flour
1/4 cup brown sugar
1 generous tsp. cinnamon
1 sprinkle ginger
1 tsp. salt
3 tsp. baking powder
Add 4 TBS cold butter, and 3 TBS shortening. Cut into flour until mixture resembles fine crumbs. Cover and refrigerate immediately.
In another bowl, combine wet ingredients:
1 cup cooled, well-mashed sweet potatoes
1 or 2 tsp. of lemon juice
1 cup milk (*I use almond milk. It's got more calcium than regular milk, but it's sweeter, and has fewer calories and less fat. It's yummy!)
1/4 cup water
2 eggs, well beaten
Combine until smooth. Refrigerate this bowl, too. (You can wait, and add the eggs in the morning, if you want them to be a bit fresher.)
In a small bowl, combine topping ingredients:
1/4 cup brown sugar
1/4 cup well-chopped walnuts
2 TBS ground flax seed (see how healthy this is?)
1.5 TBS cold butter
Mix until well combined and crumbly. Butter will get soft and a little pasty instead of crumbly, but do your best. Refrigerate.
The next morning, you'll be able to assemble this before your oven is done preheating!
Preheat oven to 350 degrees. Grease two 9" cake pans. Take all 3 bowls out of the refrigerator. Pour wet ingredients into dry ones, and fold together with a fork just until combined. Pour evenly into the pans. Divide topping in half and sprinkle each half over one cake. Let the batter sit in the pans for 3-5 minutes, then put in the oven. Bake for 25-30 minutes, or until toothpick inserted in center comes out clean. Don't over-bake; you want it nice and moist.
Serve warm!

Potato soup was the menu, with apple pie for dessert. But not just plain old soup and pie. This soup was creamy, and cheesy, and thick, and savory, and oh so good! The pie was high and golden and sweet...extremely good pie crust, 'specially considering that it was Curtis' first time making a pie.
I took a picture, and Justin said, "Are you going to put that on your blog?"
I said, "I might. Think I should?"
"Yup," he replied.
"Want me to brag on my brothers a bit, huh?" I smiled.
He just grinned.
And so, swelling with pride, I present the photo:

Now for the recipe. This is another one that I made up, so if you hate it, there's no one to blame but me. :)
But I don't think you'll hate it. Not if you like pumpkin pie. Or brown sugar. Or nuts. Or cinnamon. Or sweet potato casserole.
Sound good? Let's continue.
To begin with, this was going to be sweet-potato-cinnamon-rolls, made almost exactly like normal sweet cinnamon rolls, for breakfast. But one thing led to another, and I decided to aim for coffee cake instead. The finished product turned out more like pie than cake, however, so I have dubbed it "Coffee Pie." I know it sounds nothing like what it is, but, hey, I made it - I name it. :)
This Coffee Pie is really a thin, very moist cake. With crumble topping. The stuff is sweet, but not too sweet. Would you believe I could make two 9" coffee pies with only half a cup of brown sugar? It's true! You would never guess it is only that bit of sugar, when you're eating the cakes.
Ahem. I mean pies.
I have a confession; I've only made this recipe once, so it may still need a bit of tweaking. But if I wait for that, I'll never post it, so I'll offer it as-is. It's pretty tasty that way.
Without further rambling:
Amber's Sweet Potato Coffee Pie
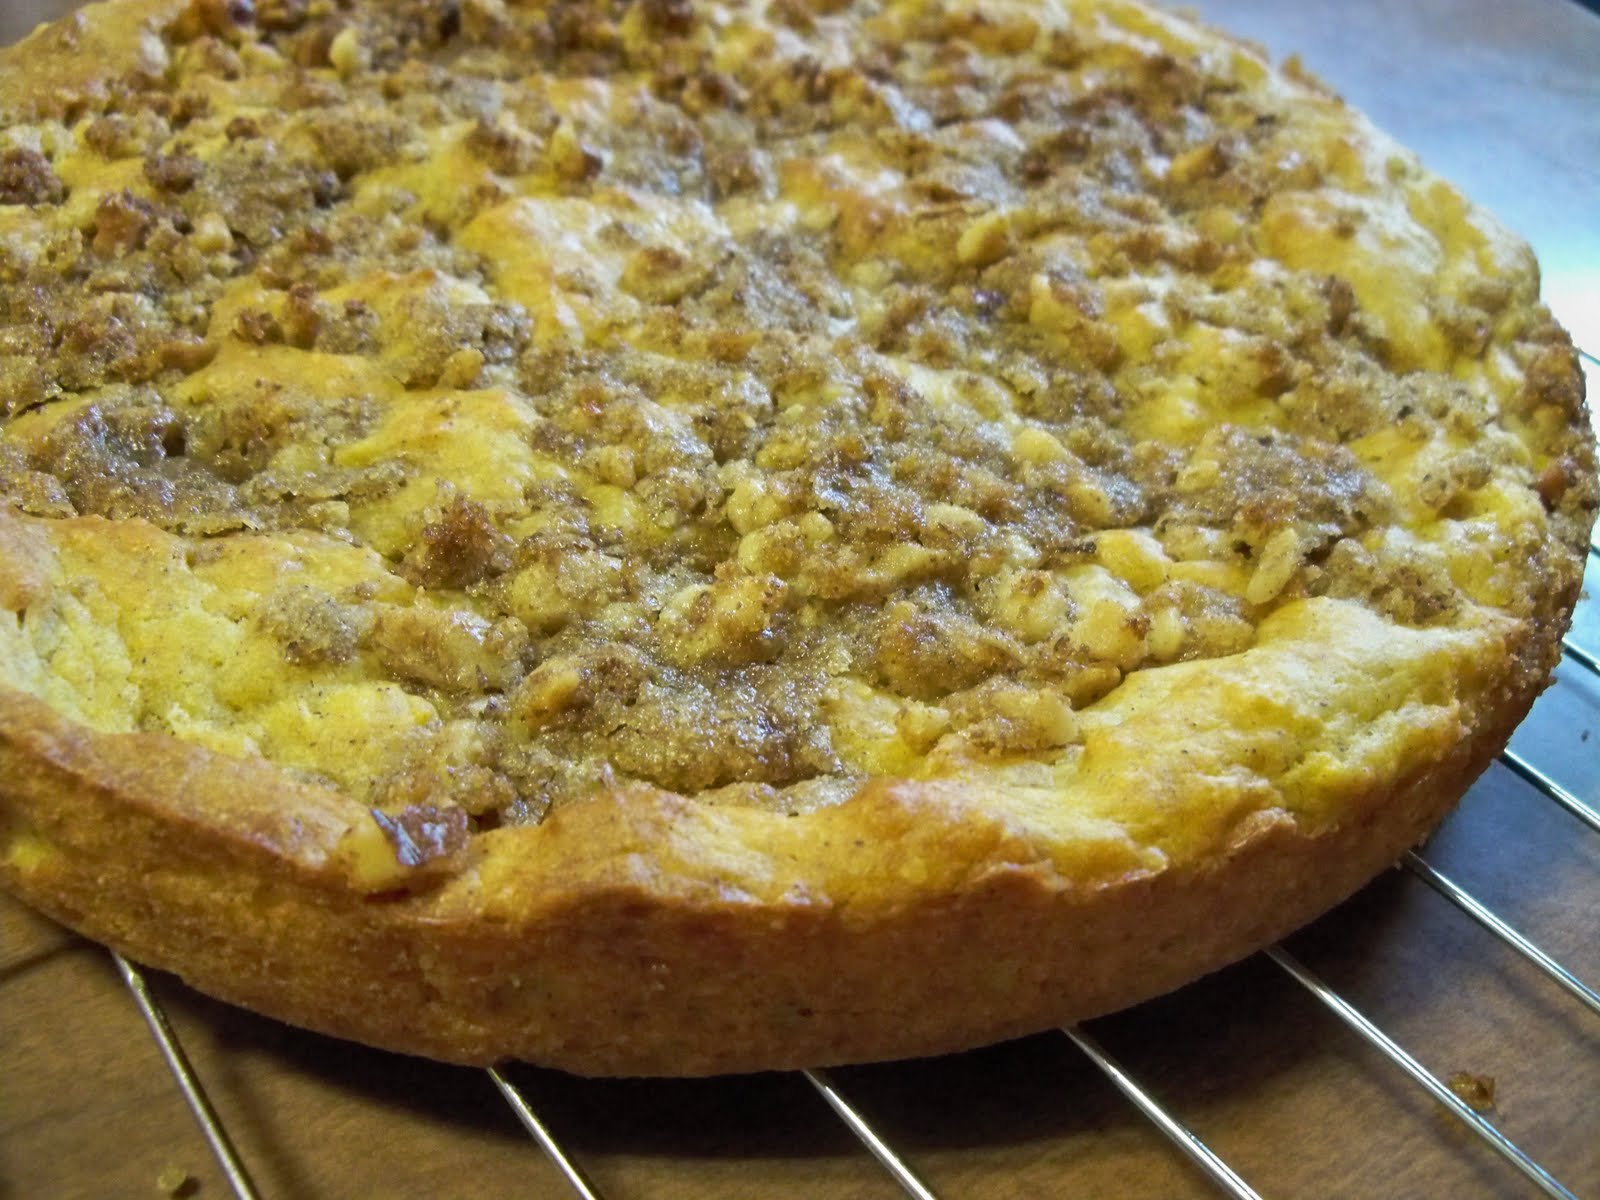 Oh - wait - one more thing. (Sorry!) This recipe is great for being made ahead of time, to save you time when you're fumbling around the kitchen in the morning because you overslept.
Well, it's actually best warm (I think - it didn't last 'til it cooled), but you can mix the ingredients ahead of time. I'll show you:
In a large mixing bowl, combine dry ingredients:
2 cups flour
1/4 cup brown sugar
1 generous tsp. cinnamon
1 sprinkle ginger
1 tsp. salt
3 tsp. baking powder
Add 4 TBS cold butter, and 3 TBS shortening. Cut into flour until mixture resembles fine crumbs. Cover and refrigerate immediately.
In another bowl, combine wet ingredients:
1 cup cooled, well-mashed sweet potatoes
1 or 2 tsp. of lemon juice
1 cup milk (*I use almond milk. It's got more calcium than regular milk, but it's sweeter, and has fewer calories and less fat. It's yummy!)
1/4 cup water
2 eggs, well beaten
Combine until smooth. Refrigerate this bowl, too. (You can wait, and add the eggs in the morning, if you want them to be a bit fresher.)
In a small bowl, combine topping ingredients:
1/4 cup brown sugar
1/4 cup well-chopped walnuts
2 TBS ground flax seed (see how healthy this is?)
1.5 TBS cold butter
Mix until well combined and crumbly. Butter will get soft and a little pasty instead of crumbly, but do your best. Refrigerate.
The next morning, you'll be able to assemble this before your oven is done preheating!
Preheat oven to 350 degrees. Grease two 9" cake pans. Take all 3 bowls out of the refrigerator. Pour wet ingredients into dry ones, and fold together with a fork just until combined. Pour evenly into the pans. Divide topping in half and sprinkle each half over one cake. Let the batter sit in the pans for 3-5 minutes, then put in the oven. Bake for 25-30 minutes, or until toothpick inserted in center comes out clean. Don't over-bake; you want it nice and moist.
Serve warm!

Thursday, November 18, 2010
The Salad I Love
So....I love it. I really, really, love it.
Mom likes it.
My brothers tolerate it.
A little sister dislikes it.
How 'bout you? Try it! Pleeeeease?
Amber's Spinach and Peas Salad
Ingredients:
~ Lots and lots of fresh, washed spinach. LOTS. As in a heaping salad bowl full.
~ 4 hard-boiled eggs (Please do boil these long enough. If you don't....well, you could always wail, dump them in a skillet, and scramble them, and hope nobody notices the slightly different texture...but hard-boiled is just better. Not that I've had the other experience, of course...)
~ 2 cups frozen peas, thawed, but not cooked
~ 1/2 cup raisins (I LOVE these in my salad, but my family doesn't.)
~ Croutons (Optional. I don't care for them in this particular salad, but others in the family do, so I put them in, hoping to coax reluctant salad-eaters into trying the salad. :)
~ 3/4 cup shredded mozzarella cheese...or more. :)
That's the salad. Toss everything together and rip up the spinach leaves into bite-size pieces. Now mix up the dressing:
~ 3 TBS miracle whip
~ 4 TBS sour cream
~ Spices, to taste (in order of amount):
Garlic Powder (I like a lot)
Onion Powder
Turmeric
Salt
Thyme
~ 2.5 TBS water
Mix thoroughly, and pour over spinach mixture. Toss to coat evenly.
You can serve immediately, or let it sit in the fridge for an hour or so, to let the flavors blend together. Then dish up a plateful, and eat it! Serves....well, anywhere from 6 t0 8 people. It depends on whether you make a meal of it - like I'd love to do, or if you only take a few leaves on your plate, like my brother did. :)
I think it's delicious. How about you?
Mom likes it.
My brothers tolerate it.
A little sister dislikes it.
How 'bout you? Try it! Pleeeeease?
Amber's Spinach and Peas Salad
Ingredients:
~ Lots and lots of fresh, washed spinach. LOTS. As in a heaping salad bowl full.
~ 4 hard-boiled eggs (Please do boil these long enough. If you don't....well, you could always wail, dump them in a skillet, and scramble them, and hope nobody notices the slightly different texture...but hard-boiled is just better. Not that I've had the other experience, of course...)
~ 2 cups frozen peas, thawed, but not cooked
~ 1/2 cup raisins (I LOVE these in my salad, but my family doesn't.)
~ Croutons (Optional. I don't care for them in this particular salad, but others in the family do, so I put them in, hoping to coax reluctant salad-eaters into trying the salad. :)
~ 3/4 cup shredded mozzarella cheese...or more. :)
That's the salad. Toss everything together and rip up the spinach leaves into bite-size pieces. Now mix up the dressing:
~ 3 TBS miracle whip
~ 4 TBS sour cream
~ Spices, to taste (in order of amount):
Garlic Powder (I like a lot)
Onion Powder
Turmeric
Salt
Thyme
~ 2.5 TBS water
Mix thoroughly, and pour over spinach mixture. Toss to coat evenly.
You can serve immediately, or let it sit in the fridge for an hour or so, to let the flavors blend together. Then dish up a plateful, and eat it! Serves....well, anywhere from 6 t0 8 people. It depends on whether you make a meal of it - like I'd love to do, or if you only take a few leaves on your plate, like my brother did. :)
I think it's delicious. How about you?
Monday, November 8, 2010
A New Recipe
I've come to the conclusion that I'm a very bad blogger. I can't seem to find the time to blog.
Of course, the fact that Blogger hasn't been cooperating with me when I try to log in might have something to do with my aversion to blogging lately. Just maybe.
But I'm here right now, so let's jump right into things.
Guess what's been on my mind lately? Well, a lot of things, but I mean in the realm of "fruit of the hands."
Cooking.
Ah, it's such the time of year for things like that! I can't believe it's November already. Every morning, I want to dress in short sleeves. (I'm in denial, you see.) But by 9:30 or 10:00 I end up pulling on a sweater or changing to long sleeves. I love fall clothes - love, love, love them! But, living in southern Virginia, I don't even think about cold weather until, oh...January or so. It doesn't seem right to get cold before then.
And I've been cold, let me tell you. We had out first frost Sunday morning, and my flowers and sweet basil died. The temperatures are in the upper 30s at night, or even the 20s, occasionally. (Yes, all you northerners are allow to snort and laugh. Just once. I'm telling you - that's COLD!)
But it's a great time of year for being in the kitchen. I love to bake, but lately I've been inspired to do cooking. I want to mix food without a recipe, stir something on the stove top, toss exotic spices together....
Ah, yes.
But baking is fun, too. I want to make pies. I made apple pie on Saturday. I love to make pie crusts! And do artwork on the top layer of my pie crust. This time it was an apple cut-out in the middle.
Oh, and pumpkin cookies! That's really the only food that exists this month; pumpkin. Bake it, mash it, "cookie" it, "pie" it, "cake" it, mix it with cream cheese frosting, mix it with chocolate chips, mix it with raisins.....yum. Have you ever made pumpkin stuff from scratch, with a real pumpkin? It's so easy. If you haven't, you must try it. You'll wonder why you thought it was complicated.
I'm sure you could figure this out yourself, but I'll tell you just because I want to.
Making pumpkin bake-ready:
1 - Slice pumpkin open, remove seeds and that stringy orange stuff. Get as much of it as you can, because it doesn't mash very well at all. Slice into quarters, then eighths, ...keep going until your slices are about 2 inches thick.
2 - Place sliced pumpkin in a glass casserole dish, and add an inch or so of water. Don't cover it. Just add enough so the pumpkin won't get crispy.
3 - Bake at 350 degrees for...oh, I don't know. 20-40 minutes. Somewhere in there. Just until pumpkin is very soft - skin included. But don't let the flesh part start browning.
4 - Let pumpkin cool enough to handle, and then scrap out as much flesh off the skins as you can. Discard skin. Put flesh into a bowl and mash with a potato masher until smooth.
You're done! I told you it was easy. Use as regular canned pumpkin. (Not pumpkin pie mix - you have to add spices for that.) Stay tuned for a really yummy pumpkin recipe.
But cooking has been my interest lately. Aside from pumpkin and pies, that is. I stayed up late one night this week (really late), and the last thing I was doing on my computer was researching how to make the "perfect gravy."
Forgive me, but most homemade gravy isn't so good. It's lumpy, it's bland, it's watery. It's...nothing. I've never made anything good in that realm. But my brothers adore good gravy, so I want to learn to make it for them.
Wanna see what I found? Of course you do.
This site was very inspiring. Great photos. And descriptions.
And this video made me ask Mom if I can make our next Sunday dinner.
I found some other stuff, too, but those two sites were my favorites.
Oh yes - I promised you a pumpkin recipe. This is another "Amber Creation." I've been considering putting a little cookbook together, of dishes I've invented. Would that be a good idea, or not? I trust you guys; give me some feedback; would you want to read such a book? If you read it, would it be to laugh at the tales of how each recipe was birthed, or would you actually use it to cook?
This pumpkin dish isn't totally my own. I got the idea from The Pioneer Woman Cooks, when I was browsing the site, looking for gravy help. But, I promise, I didn't steal anything. I just used it as a starting point. Mine is pumpkin, hers is sweet 'taters. Mine uses less sugar and it's cheaper to make. But hers looks good too, so maybe you'll want to pay her a visit!
Anyway. On to the pumpkin.
Amber's Non-Dessert Pumpkin (so named because my siblings couldn't believe it was actually for the main meal)
Ingredients:
2 cups mashed pumpkin
2 eggs
4 TBS butter (because that's what you have. More might have been good.)
1/4 cup milk (was it that much? Maybe only 3 TBS. Not sure. You try it.)
Cinnamon. Lots of Cinnamon.
1 cup Old Fashioned Oats
1/4 cup brown sugar, divided
Yeah, I think that was it.
No - wait - add a dash of allspice.
Directions: Mix pumpkin, eggs, milk, 2 TBS sugar, a heaping shake of cinnamon, and that dash of allspice in a mixing bowl until smooth. (If you want to save dishes, use the same bowl you mashed the pumpkin in.) Pour into a 9x9 glass baking dish, and set aside. In another bowl, put the oats, rest of the brown sugar, more cinnamon, and the butter, chopped into smaller pieces. Cut butter into other ingredients until crumbly and yummy. (Taste to be sure!) It will want to clump a bit, 'specially if your butter is getting warm, but do your best to crumble the stuff on top of the pumpkin batter. Now bake at 350 degrees for about 20-25 minutes. Let cool slightly before serving.
If you're expecting sweet potatoes, ...don't. If you're expecting pumpkin pie...don't. Expect something totally new and different, and slightly healthy. It's a squash. But yummy. Oh, very yummy. Be sure to mash the pumpkin very smooth, as the texture plays an important part in this dish.
We liked it. Let me know what you think! Happy baking and cooking to you!
Of course, the fact that Blogger hasn't been cooperating with me when I try to log in might have something to do with my aversion to blogging lately. Just maybe.
But I'm here right now, so let's jump right into things.
Guess what's been on my mind lately? Well, a lot of things, but I mean in the realm of "fruit of the hands."
Cooking.
Ah, it's such the time of year for things like that! I can't believe it's November already. Every morning, I want to dress in short sleeves. (I'm in denial, you see.) But by 9:30 or 10:00 I end up pulling on a sweater or changing to long sleeves. I love fall clothes - love, love, love them! But, living in southern Virginia, I don't even think about cold weather until, oh...January or so. It doesn't seem right to get cold before then.
And I've been cold, let me tell you. We had out first frost Sunday morning, and my flowers and sweet basil died. The temperatures are in the upper 30s at night, or even the 20s, occasionally. (Yes, all you northerners are allow to snort and laugh. Just once. I'm telling you - that's COLD!)
But it's a great time of year for being in the kitchen. I love to bake, but lately I've been inspired to do cooking. I want to mix food without a recipe, stir something on the stove top, toss exotic spices together....
Ah, yes.
But baking is fun, too. I want to make pies. I made apple pie on Saturday. I love to make pie crusts! And do artwork on the top layer of my pie crust. This time it was an apple cut-out in the middle.
Oh, and pumpkin cookies! That's really the only food that exists this month; pumpkin. Bake it, mash it, "cookie" it, "pie" it, "cake" it, mix it with cream cheese frosting, mix it with chocolate chips, mix it with raisins.....yum. Have you ever made pumpkin stuff from scratch, with a real pumpkin? It's so easy. If you haven't, you must try it. You'll wonder why you thought it was complicated.
I'm sure you could figure this out yourself, but I'll tell you just because I want to.
Making pumpkin bake-ready:
1 - Slice pumpkin open, remove seeds and that stringy orange stuff. Get as much of it as you can, because it doesn't mash very well at all. Slice into quarters, then eighths, ...keep going until your slices are about 2 inches thick.
2 - Place sliced pumpkin in a glass casserole dish, and add an inch or so of water. Don't cover it. Just add enough so the pumpkin won't get crispy.
3 - Bake at 350 degrees for...oh, I don't know. 20-40 minutes. Somewhere in there. Just until pumpkin is very soft - skin included. But don't let the flesh part start browning.
4 - Let pumpkin cool enough to handle, and then scrap out as much flesh off the skins as you can. Discard skin. Put flesh into a bowl and mash with a potato masher until smooth.
You're done! I told you it was easy. Use as regular canned pumpkin. (Not pumpkin pie mix - you have to add spices for that.) Stay tuned for a really yummy pumpkin recipe.
But cooking has been my interest lately. Aside from pumpkin and pies, that is. I stayed up late one night this week (really late), and the last thing I was doing on my computer was researching how to make the "perfect gravy."
Forgive me, but most homemade gravy isn't so good. It's lumpy, it's bland, it's watery. It's...nothing. I've never made anything good in that realm. But my brothers adore good gravy, so I want to learn to make it for them.
Wanna see what I found? Of course you do.
This site was very inspiring. Great photos. And descriptions.
And this video made me ask Mom if I can make our next Sunday dinner.
I found some other stuff, too, but those two sites were my favorites.
Oh yes - I promised you a pumpkin recipe. This is another "Amber Creation." I've been considering putting a little cookbook together, of dishes I've invented. Would that be a good idea, or not? I trust you guys; give me some feedback; would you want to read such a book? If you read it, would it be to laugh at the tales of how each recipe was birthed, or would you actually use it to cook?
This pumpkin dish isn't totally my own. I got the idea from The Pioneer Woman Cooks, when I was browsing the site, looking for gravy help. But, I promise, I didn't steal anything. I just used it as a starting point. Mine is pumpkin, hers is sweet 'taters. Mine uses less sugar and it's cheaper to make. But hers looks good too, so maybe you'll want to pay her a visit!
Anyway. On to the pumpkin.
Amber's Non-Dessert Pumpkin (so named because my siblings couldn't believe it was actually for the main meal)
Ingredients:
2 cups mashed pumpkin
2 eggs
4 TBS butter (because that's what you have. More might have been good.)
1/4 cup milk (was it that much? Maybe only 3 TBS. Not sure. You try it.)
Cinnamon. Lots of Cinnamon.
1 cup Old Fashioned Oats
1/4 cup brown sugar, divided
Yeah, I think that was it.
No - wait - add a dash of allspice.
Directions: Mix pumpkin, eggs, milk, 2 TBS sugar, a heaping shake of cinnamon, and that dash of allspice in a mixing bowl until smooth. (If you want to save dishes, use the same bowl you mashed the pumpkin in.) Pour into a 9x9 glass baking dish, and set aside. In another bowl, put the oats, rest of the brown sugar, more cinnamon, and the butter, chopped into smaller pieces. Cut butter into other ingredients until crumbly and yummy. (Taste to be sure!) It will want to clump a bit, 'specially if your butter is getting warm, but do your best to crumble the stuff on top of the pumpkin batter. Now bake at 350 degrees for about 20-25 minutes. Let cool slightly before serving.
If you're expecting sweet potatoes, ...don't. If you're expecting pumpkin pie...don't. Expect something totally new and different, and slightly healthy. It's a squash. But yummy. Oh, very yummy. Be sure to mash the pumpkin very smooth, as the texture plays an important part in this dish.
We liked it. Let me know what you think! Happy baking and cooking to you!
Thursday, September 30, 2010
Apple Recipes
It's apple season! And that means lots of apples.
Around here, we usually don't get our bulk purchase of apples until a little later in the season, sometime in October, but this year we were blessed with the opportunity to buy a large amount of apples at a great price just last week. The apples were second-class - meaning they weren't "perfect" enough to be sent to the store, but they were great for preserving! We did have a few bad spots to cut around, but all-in-all it was a great deal! Thank You, Lord, for Your gifts!
We got 3.5 bushels of some sort of yellowish apple - we didn't pick the type, and we're not sure what they were, but they looked and tasted like golden delicious apples. They were nice and sweet, but not too soft.
3.5 bushels may not sound like a lot to some of you, but we've never put up that many apples before, so it seemed like a lot to us. For those of you who need a picture in your minds; imagine a box the size of one of those toilet-paper packages that holds 12 rolls (hey, I'm creative, okay?). Now imagine that box filled to the brim and heaped up to overflowing with luscious apples. That's 1/2 a bushel. We got 7 of those.
We made lots and lots of applesauce (SO easy!), some pie filling, and some apple dumplings the first day. We spent just about all of Tuesday in the kitchen. On Wednesday, it only took the morning to finish the remaining apples; we shredded or sliced them, and froze them for use in recipes later on.
When you're dealing with that many apples, even the piles of skin and cores can look huge:
 My younger sisters, Tiffany and Lezely worked hard alongside Mom and I. Tiffany was really good at running the apple peeler/corer (we have the kind that you crank, and it does it all at once.) I think Tiffany peeled and cored almost 3 bushels by herself! Mom worked on the pie filling, and I did the apple dumplings. Lezley was here and there, doing whatever we asked her to do, whether it was washing the apples, loading pans with sliced apples, or helping Tiffany peel apples.
I thought you might like some apple recipes, since it's apple season in many places right now. :)
(I don't have the time to share the pie filling recipe right now, but it's definitely worth making. Store apple pie filling tastes like cinnamon-flavored Vaseline, in my humble opinion.)
Have you ever had homemade applesauce? If you haven't, you're missing out. It puts the store stuff to shame. It's so sweet. So chunky. So warm and hearty, if you eat it out of the pan. :)
It's also the easiest thing in the world to make. I'll give you the recipe. Ready?
#1: Peel, core, and slice a bunch of apples.
#2: Sprinkle them with lemon juice - just a tad, to keep them from going brown.
#3: Place apples in a slow cooker. Fill it up!
#4: Add a few cups of water - 2-4, depending on the size of your cooker.
#5: Cover, and cook on high for a few hours, until the apples are soft.
#6: Mash the apples right in the slow cooker, with the water. Leave some chunks if you like it that way! Add some sugar if you want - I think it's just right without it.
#7: Eat warm if at all possible!
See? I told you it was easy! I like to add cinnamon and peanut butter to my bowl of warm apple sauce. It's all up to you. But do add the cinnamon. It's just the perfect touch!
Speaking of perfect, let me share a scrumptious dessert with you; Apple Dumplings. So yummy! Everybody's heard of apple dumplings, but surprisingly few have ever made them. That's sad, considering how easy they are to make. We had never even eaten apple dumplings until last year, but once we got our first bite, we knew we had to make them again!
Here's how you can make your own:
Apple Dumplings
~ First, make up some pie crust. Use your favorite, tried-and-true recipe. For me, that's Tammy's Foul-proof Pie Crust. It always works. She uses all butter in her recipe, which I love, but for a big batch of dough like this, I substitute shortening for about 1/3 of the butter, just to cut down on the cost. I doubled the recipe, which is about the amount for 6 pie crusts. That gave me 3 dozen dumplings, so your ratio is pretty much 6 dumplings for every one pie you could have made...but I roll my dough pretty thin, so you'll have to see what your exact ratio is for your kitchen.
~ Peel, core, and slice your apples. (It takes about 12 to fill up a 9"X13" pan.) If you have an apple peeler like ours, that's easy. If you do it by hand, don't bother to slice your apple. You want it to stay intact. Our apple peeler slices the apple very thinly as it peels, and it will all stay nicely stacked up for us.
~ Grab a chunk of dough that's slightly larger than a golf ball, and roll it out to be about the size of a saucer - smaller or larger, depending on your apple sizes. I use lots of flour and roll my crust fairly thin. I don't have much trouble with holes or crust sticking to the table....but, then again, I've had lots of practice with crusts. If you make fewer dumplings, with thicker crust, it will be positively yummy that way, too! In fact, I like thicker crust - I'm just too cheap to make it that way. :)
Is this recipe getting too wordy for you?
~ Set your peeled and cored apple right in the middle of the dough. Bring the dough up and around it, wrapping the apple completely in dough. Give it some good pats to seal it in there, check that there are no holes in the bottom of the dough, and set the dumpling in an un-greased glass baking dish.
 ~ At this point, you can refrigerate or freeze the dumplings (more info on that in a second) or bake them. Before baking, however, you want to make up a sauce to pour over the dumplings. That goes like this: (The amount is for a 9"x13" pan, or 12 dumplings)
1 1/2 cups water
1 cup brown sugar
2-4 TBS of butter
A HEAPING TBS of cinnamon
Combine everything except for the butter and bring to a boil. Let boil for about 5 minutes, then remove from heat and stir in butter. Once the butter has melted and been stirred in, pour the sauce over the dumplings.
~ Bake for 20-30 minutes at 350 degrees, or until apples are soft and smell wonderful.
~ Eat as-is, or with whipped cream on top. Or, if you are like the family who introduced us to apple dumplings, put one in a bowl, drown with milk, and eat with a spoon!
Although we could easily eat 3 dozen dumplings in a week, we decided to save 2 dozen in the freezer for later use. To do that, simply wrap the dumplings individually in handy wrap, and set in the freezer until solid. Then put them in freezer bags, (still wrapped) and - wala! - you're done!
Here's part of what we made on the first day. The apple dumplings are in the bags. Apple sauce and pie filling are in the jars and plastic containers. This all went in the freezer.
 I must run for now, but I wish you all a very happy apple season!
Around here, we usually don't get our bulk purchase of apples until a little later in the season, sometime in October, but this year we were blessed with the opportunity to buy a large amount of apples at a great price just last week. The apples were second-class - meaning they weren't "perfect" enough to be sent to the store, but they were great for preserving! We did have a few bad spots to cut around, but all-in-all it was a great deal! Thank You, Lord, for Your gifts!
We got 3.5 bushels of some sort of yellowish apple - we didn't pick the type, and we're not sure what they were, but they looked and tasted like golden delicious apples. They were nice and sweet, but not too soft.
3.5 bushels may not sound like a lot to some of you, but we've never put up that many apples before, so it seemed like a lot to us. For those of you who need a picture in your minds; imagine a box the size of one of those toilet-paper packages that holds 12 rolls (hey, I'm creative, okay?). Now imagine that box filled to the brim and heaped up to overflowing with luscious apples. That's 1/2 a bushel. We got 7 of those.
We made lots and lots of applesauce (SO easy!), some pie filling, and some apple dumplings the first day. We spent just about all of Tuesday in the kitchen. On Wednesday, it only took the morning to finish the remaining apples; we shredded or sliced them, and froze them for use in recipes later on.
When you're dealing with that many apples, even the piles of skin and cores can look huge:
 My younger sisters, Tiffany and Lezely worked hard alongside Mom and I. Tiffany was really good at running the apple peeler/corer (we have the kind that you crank, and it does it all at once.) I think Tiffany peeled and cored almost 3 bushels by herself! Mom worked on the pie filling, and I did the apple dumplings. Lezley was here and there, doing whatever we asked her to do, whether it was washing the apples, loading pans with sliced apples, or helping Tiffany peel apples.
I thought you might like some apple recipes, since it's apple season in many places right now. :)
(I don't have the time to share the pie filling recipe right now, but it's definitely worth making. Store apple pie filling tastes like cinnamon-flavored Vaseline, in my humble opinion.)
Have you ever had homemade applesauce? If you haven't, you're missing out. It puts the store stuff to shame. It's so sweet. So chunky. So warm and hearty, if you eat it out of the pan. :)
It's also the easiest thing in the world to make. I'll give you the recipe. Ready?
#1: Peel, core, and slice a bunch of apples.
#2: Sprinkle them with lemon juice - just a tad, to keep them from going brown.
#3: Place apples in a slow cooker. Fill it up!
#4: Add a few cups of water - 2-4, depending on the size of your cooker.
#5: Cover, and cook on high for a few hours, until the apples are soft.
#6: Mash the apples right in the slow cooker, with the water. Leave some chunks if you like it that way! Add some sugar if you want - I think it's just right without it.
#7: Eat warm if at all possible!
See? I told you it was easy! I like to add cinnamon and peanut butter to my bowl of warm apple sauce. It's all up to you. But do add the cinnamon. It's just the perfect touch!
Speaking of perfect, let me share a scrumptious dessert with you; Apple Dumplings. So yummy! Everybody's heard of apple dumplings, but surprisingly few have ever made them. That's sad, considering how easy they are to make. We had never even eaten apple dumplings until last year, but once we got our first bite, we knew we had to make them again!
Here's how you can make your own:
Apple Dumplings
~ First, make up some pie crust. Use your favorite, tried-and-true recipe. For me, that's Tammy's Foul-proof Pie Crust. It always works. She uses all butter in her recipe, which I love, but for a big batch of dough like this, I substitute shortening for about 1/3 of the butter, just to cut down on the cost. I doubled the recipe, which is about the amount for 6 pie crusts. That gave me 3 dozen dumplings, so your ratio is pretty much 6 dumplings for every one pie you could have made...but I roll my dough pretty thin, so you'll have to see what your exact ratio is for your kitchen.
~ Peel, core, and slice your apples. (It takes about 12 to fill up a 9"X13" pan.) If you have an apple peeler like ours, that's easy. If you do it by hand, don't bother to slice your apple. You want it to stay intact. Our apple peeler slices the apple very thinly as it peels, and it will all stay nicely stacked up for us.
~ Grab a chunk of dough that's slightly larger than a golf ball, and roll it out to be about the size of a saucer - smaller or larger, depending on your apple sizes. I use lots of flour and roll my crust fairly thin. I don't have much trouble with holes or crust sticking to the table....but, then again, I've had lots of practice with crusts. If you make fewer dumplings, with thicker crust, it will be positively yummy that way, too! In fact, I like thicker crust - I'm just too cheap to make it that way. :)
Is this recipe getting too wordy for you?
~ Set your peeled and cored apple right in the middle of the dough. Bring the dough up and around it, wrapping the apple completely in dough. Give it some good pats to seal it in there, check that there are no holes in the bottom of the dough, and set the dumpling in an un-greased glass baking dish.
 ~ At this point, you can refrigerate or freeze the dumplings (more info on that in a second) or bake them. Before baking, however, you want to make up a sauce to pour over the dumplings. That goes like this: (The amount is for a 9"x13" pan, or 12 dumplings)
1 1/2 cups water
1 cup brown sugar
2-4 TBS of butter
A HEAPING TBS of cinnamon
Combine everything except for the butter and bring to a boil. Let boil for about 5 minutes, then remove from heat and stir in butter. Once the butter has melted and been stirred in, pour the sauce over the dumplings.
~ Bake for 20-30 minutes at 350 degrees, or until apples are soft and smell wonderful.
~ Eat as-is, or with whipped cream on top. Or, if you are like the family who introduced us to apple dumplings, put one in a bowl, drown with milk, and eat with a spoon!
Although we could easily eat 3 dozen dumplings in a week, we decided to save 2 dozen in the freezer for later use. To do that, simply wrap the dumplings individually in handy wrap, and set in the freezer until solid. Then put them in freezer bags, (still wrapped) and - wala! - you're done!
Here's part of what we made on the first day. The apple dumplings are in the bags. Apple sauce and pie filling are in the jars and plastic containers. This all went in the freezer.
 I must run for now, but I wish you all a very happy apple season!
Wednesday, July 28, 2010
Those long-promised pictures
(Note: I wrote this post on Wednesday, but it took me until Thursday night to load the pictures and publish it...just so there's no confusion. :)
Oh, there's so much I could catch you up on today! For starters, I just made a batch of chocolate chip cookies, and have a few cookie-making tips to share:
~ If you replace half your butter with shortening in an all-butter cookie recipe, you get softer cookies. (yeah, I know - health goes out the window!) Ditto for replacing white sugar with brown. Reverse the process to get crispier cookies.
~ Don't leave out the salt. It's important to the finished taste and texture. And sea salt is way better than regular table salt.
~ ALWAYS sample your dough! :) :)
Not to switch topics too randomly, but we're having missions conference at my church this week, and it's been wonderful. I'm both sad and happy that it's Wednesday, meaning the week is half over. Every night has been so good! I can't wait for each night, yet I wish I could relive the one before. The preaching has been great, the missionary presentations wonderful, and the fellowship before and after services absolutely uplifting.
That's been my favorite part this year - the fellowship. I love being a part of a church this size, where I can talk directly to the speakers and missionaries and get more stories from them after the service. I love asking fellow members how they are enjoying the week. I love eating supper together before the service, and discussing how the Lord has been working in our lives this week. I love inviting friends to come to church and having them show up!
Also, guess what the 24th of this month was? It was the 3-month anniversary of Heather and Eugene's (my sister and brother-in-law's) wedding! (Incidentally, the day also marked the 1 year anniversary of the time they started courting.)
In memory of that special day, I thought I'd post some of those pictures I keep promising. (These were all taken with our camera, not the professional photographer's.)
 Just after their first kiss
 Sisters!
 Heather with the marriage certificate. :)
 My family. We number 9 now!
 The wedding party.
Oh, there's so much I could catch you up on today! For starters, I just made a batch of chocolate chip cookies, and have a few cookie-making tips to share:
~ If you replace half your butter with shortening in an all-butter cookie recipe, you get softer cookies. (yeah, I know - health goes out the window!) Ditto for replacing white sugar with brown. Reverse the process to get crispier cookies.
~ Don't leave out the salt. It's important to the finished taste and texture. And sea salt is way better than regular table salt.
~ ALWAYS sample your dough! :) :)
Not to switch topics too randomly, but we're having missions conference at my church this week, and it's been wonderful. I'm both sad and happy that it's Wednesday, meaning the week is half over. Every night has been so good! I can't wait for each night, yet I wish I could relive the one before. The preaching has been great, the missionary presentations wonderful, and the fellowship before and after services absolutely uplifting.
That's been my favorite part this year - the fellowship. I love being a part of a church this size, where I can talk directly to the speakers and missionaries and get more stories from them after the service. I love asking fellow members how they are enjoying the week. I love eating supper together before the service, and discussing how the Lord has been working in our lives this week. I love inviting friends to come to church and having them show up!
Also, guess what the 24th of this month was? It was the 3-month anniversary of Heather and Eugene's (my sister and brother-in-law's) wedding! (Incidentally, the day also marked the 1 year anniversary of the time they started courting.)
In memory of that special day, I thought I'd post some of those pictures I keep promising. (These were all taken with our camera, not the professional photographer's.)
 Just after their first kiss
 Sisters!
 Heather with the marriage certificate. :)
 My family. We number 9 now!
 The wedding party.
That's all for now. Maybe more later. :)
Tuesday, June 29, 2010
Return of the Squash
Hello, everyone!
After temporarily abandoning my blog, I'm back with an almost-too-easy post, to ease myself back into the swing of things. I have been uploading 3-camera-cards-worth of pictures onto my computer in the past couple of days, and the desire to share some of those with you has overcome my reluctance to blog. :)
This post shall simply be a recipe; an Amber recipe - and you know I only share recipes I'm proud of! (Well.... ones that I'm proud of, or ones that have stories behind them, or ones that involve a funny flop...you know. :)
I really can't take full credit for this recipe, because my sister Heather gave me the idea. She, like many people I know, has yellow summer squash and zucchini overflowing in her kitchen, and was looking for new and yummy ways to fix it.
Now, normally, our family has two options for squash: boil it, or fry it - but Heather said her new in-laws bake it, with some butter and garlic powder on top. She added mozzarella cheese.
Those are all the details she gave me; really! From that bit of a yummy idea, I went home and came up with the following zucchini bake:
Amber's (with some help) Zucchini Bake
Ingredients:
~ Enough Zucchini to fill a food processor like the one below: (I think I used 3 zucchini the size of the one on the cutting board....or was it only 2? And yes, I KNOW you're not supposed to let the stuff get that big before you pick it, but it was hiding from us! You'd think it didn't want to be eaten! But that's the nice thing about this recipe - you can use the big zucchini that you forgot to pick in time, and it still tastes pretty good.)
 The other ingredients are all pictured above as well:
~ 1/2 cup butter (1 stick)
~ Garlic Powder
~ Italian Dressing
~ Grated Parmesan Cheese
What? Oh - why there are no measurements for the last 3 ingredients?
...Come on. This is an Amber Recipe! :) :)
Slice the zucchini finely in the food processor, or chop thinly by hand. Unwrap the butter stick and use the butter paper to lightly grease a 9"x13" pan - it doesn't need to be heavily greased. Divide the zucchini into thirds, and spread one third in a layer on the bottom of the 9"x13" pan. Slice the butter stick as thinly as you can, and divide the slices into three piles as well. Sprinkle 1/3 of the butter slices over the zucchini in the pan. Sprinkle to taste (I like it generous!) with garlic powder (NOT garlic salt, by the way!). Take the lid off your Italian dressing, and "gloop" it on - again, to taste. I've found that a little goes a long way. Just 4 or 5 "gloops" per layer seems to do the trick.

Oh yes - one more squash idea, for those of you who prefer yellow squash over zucchini. Mom came up with this, and I LOVE it:
 Squash spaghetti.
...Basically.
You just shred your yellow squash, add lots of meat and spaghetti sauce, bake 20 minutes at 350 degrees, and serve with grated Parmesan cheese on top. (Yes, we like our cheese!)
That's all I have for right now. Maybe there will be more pictures coming soon, on other topics.
Thanks for being so understanding about my blogging break; I needed it. I needed to confirm in my own mind that I blog because I like it and feel that it's good, not because I feel pressured to perform, or because I'm tied to this little grey keyboard and screen.
I hope y'all are having a blessed week.
P.S. I just realize I didn't rave about that zucchini recipe enough. You need to try it. There is no way to describe how good it smells as it bakes, and how tempting it is to just keep sneaking helping after helping of the cheesy, spicy goodness....
After temporarily abandoning my blog, I'm back with an almost-too-easy post, to ease myself back into the swing of things. I have been uploading 3-camera-cards-worth of pictures onto my computer in the past couple of days, and the desire to share some of those with you has overcome my reluctance to blog. :)
This post shall simply be a recipe; an Amber recipe - and you know I only share recipes I'm proud of! (Well.... ones that I'm proud of, or ones that have stories behind them, or ones that involve a funny flop...you know. :)
I really can't take full credit for this recipe, because my sister Heather gave me the idea. She, like many people I know, has yellow summer squash and zucchini overflowing in her kitchen, and was looking for new and yummy ways to fix it.
Now, normally, our family has two options for squash: boil it, or fry it - but Heather said her new in-laws bake it, with some butter and garlic powder on top. She added mozzarella cheese.
Those are all the details she gave me; really! From that bit of a yummy idea, I went home and came up with the following zucchini bake:
Amber's (with some help) Zucchini Bake
Ingredients:
~ Enough Zucchini to fill a food processor like the one below: (I think I used 3 zucchini the size of the one on the cutting board....or was it only 2? And yes, I KNOW you're not supposed to let the stuff get that big before you pick it, but it was hiding from us! You'd think it didn't want to be eaten! But that's the nice thing about this recipe - you can use the big zucchini that you forgot to pick in time, and it still tastes pretty good.)
 The other ingredients are all pictured above as well:
~ 1/2 cup butter (1 stick)
~ Garlic Powder
~ Italian Dressing
~ Grated Parmesan Cheese
What? Oh - why there are no measurements for the last 3 ingredients?
...Come on. This is an Amber Recipe! :) :)
Directions:
Slice the zucchini finely in the food processor, or chop thinly by hand. Unwrap the butter stick and use the butter paper to lightly grease a 9"x13" pan - it doesn't need to be heavily greased. Divide the zucchini into thirds, and spread one third in a layer on the bottom of the 9"x13" pan. Slice the butter stick as thinly as you can, and divide the slices into three piles as well. Sprinkle 1/3 of the butter slices over the zucchini in the pan. Sprinkle to taste (I like it generous!) with garlic powder (NOT garlic salt, by the way!). Take the lid off your Italian dressing, and "gloop" it on - again, to taste. I've found that a little goes a long way. Just 4 or 5 "gloops" per layer seems to do the trick.
Now sprinkle Parmesan on generously. Did you hear me? Generously. This is what makes this dish kick!
Repeat these layers, starting with the zucchini again, then butter, garlic powder, dressing, and cheese. Repeat once more, if desired, and according to the amount of zucchini you have. The last time I did this recipe, I used three layers - as I've directed in this recipe - and it filled the 9"x13" pan to overflowing, but the first time I made this we only had enough zucchini to do one layer on a cookie sheet. You be the judge. You should finish with cheese on top - again, a nice thick layer.
Bake for 20 minutes - or until the cheese is nicely brown and smells heavenly - at 350 degrees.
Repeat these layers, starting with the zucchini again, then butter, garlic powder, dressing, and cheese. Repeat once more, if desired, and according to the amount of zucchini you have. The last time I did this recipe, I used three layers - as I've directed in this recipe - and it filled the 9"x13" pan to overflowing, but the first time I made this we only had enough zucchini to do one layer on a cookie sheet. You be the judge. You should finish with cheese on top - again, a nice thick layer.
Bake for 20 minutes - or until the cheese is nicely brown and smells heavenly - at 350 degrees.

Oh yes - one more squash idea, for those of you who prefer yellow squash over zucchini. Mom came up with this, and I LOVE it:
 Squash spaghetti.
...Basically.
You just shred your yellow squash, add lots of meat and spaghetti sauce, bake 20 minutes at 350 degrees, and serve with grated Parmesan cheese on top. (Yes, we like our cheese!)
That's all I have for right now. Maybe there will be more pictures coming soon, on other topics.
Thanks for being so understanding about my blogging break; I needed it. I needed to confirm in my own mind that I blog because I like it and feel that it's good, not because I feel pressured to perform, or because I'm tied to this little grey keyboard and screen.
I hope y'all are having a blessed week.
P.S. I just realize I didn't rave about that zucchini recipe enough. You need to try it. There is no way to describe how good it smells as it bakes, and how tempting it is to just keep sneaking helping after helping of the cheesy, spicy goodness....
Subscribe to:
Posts (Atom)
.gif)


